UNDER CONSTRUCTION
UNDER CONSTRUCTION
|
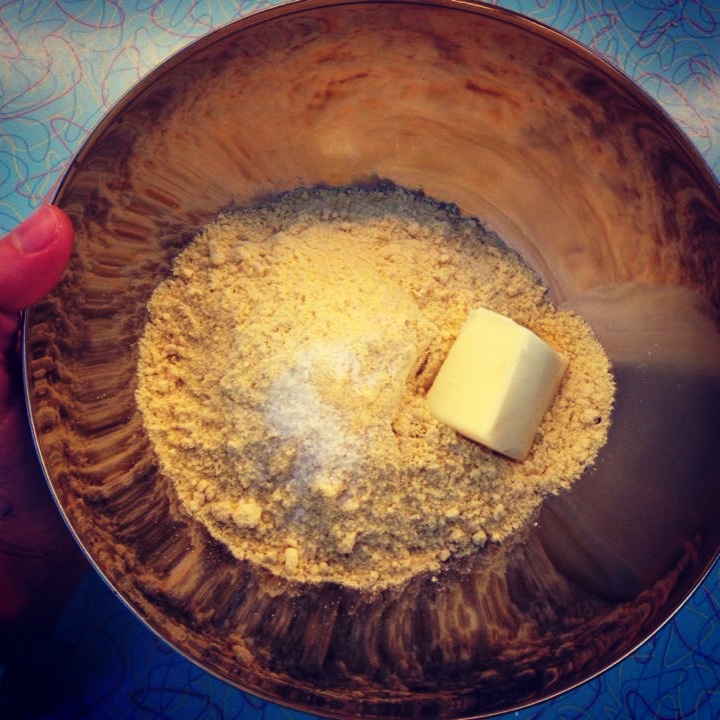
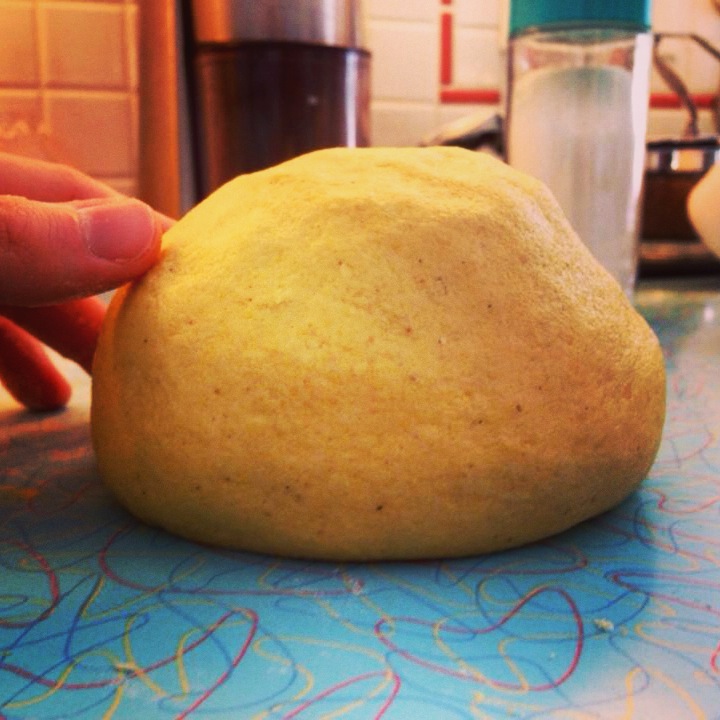
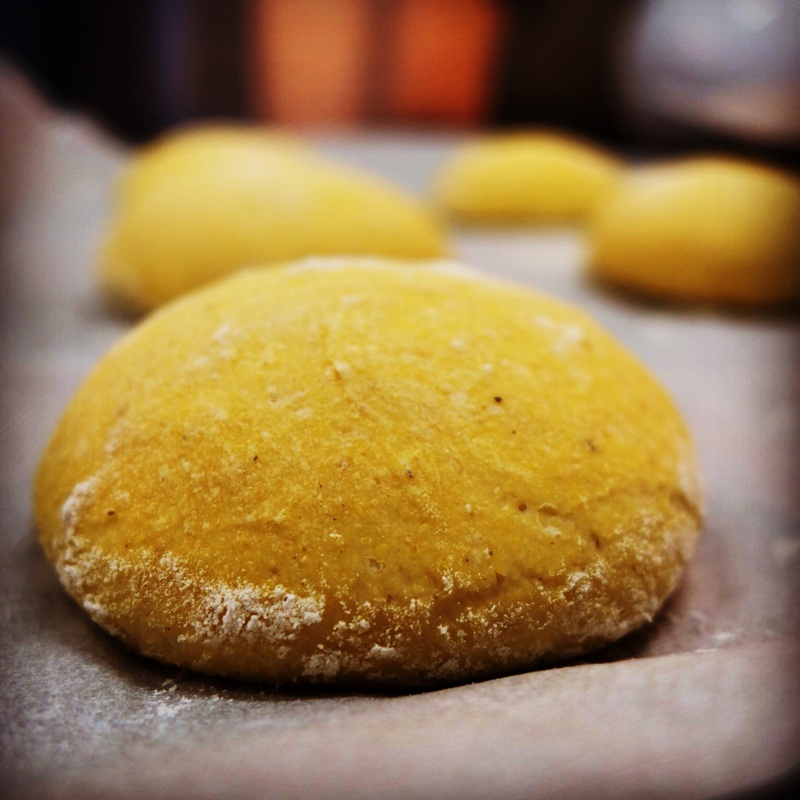
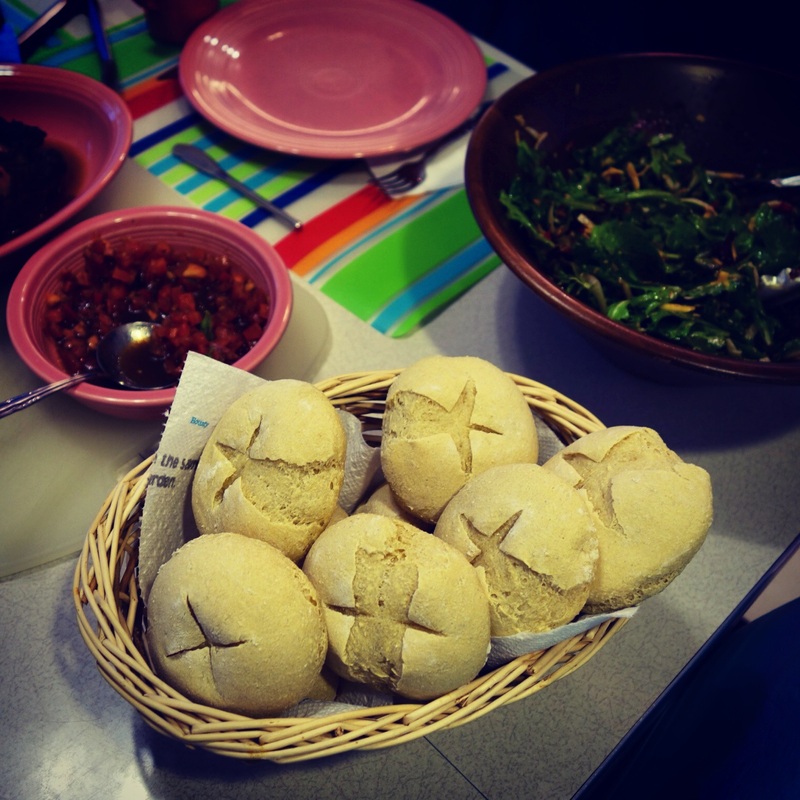
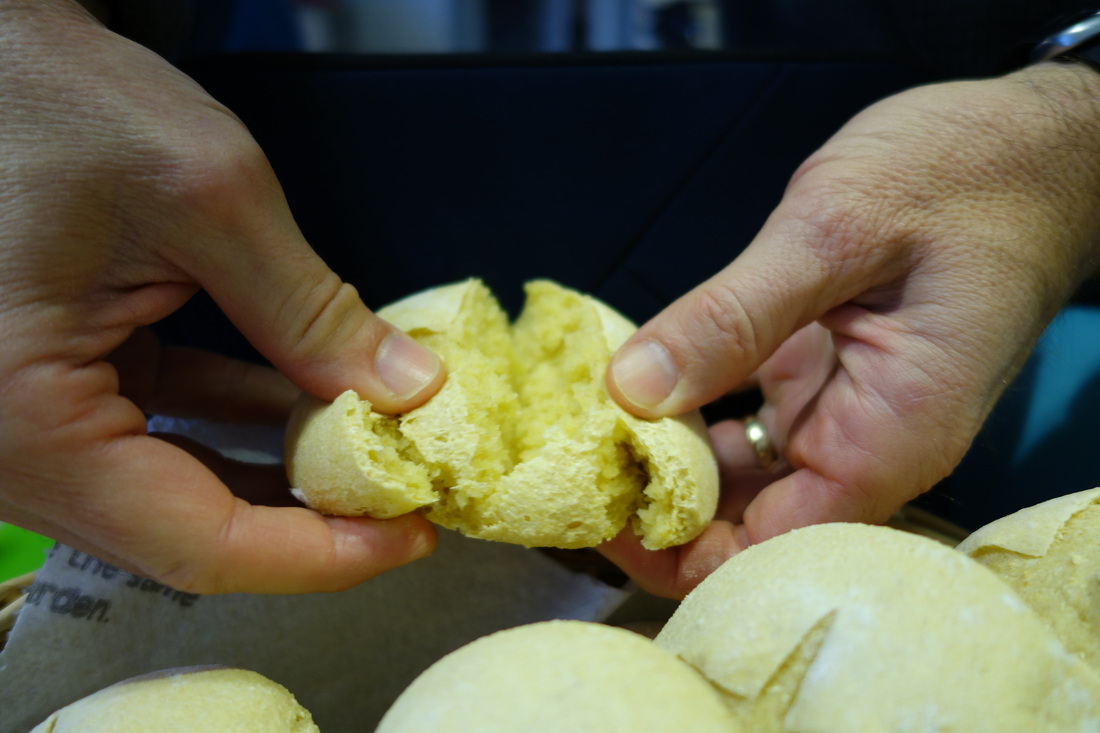
One day I realized I had a bag of corn flour in the kitchen cabinet (from another project) and I decided I had to make bread with it. Cornbread--the mushy richer kind--obviously came to mind. BUT I wanted to use yeast. After much research, I now have a working recipe of yeasted corn breads. The bread itself had a drier consistency, in my opinion, when compared to an entirely wheat-based bread...but that is to be expected when working with corn flour, which has no gluten. If you like a very corny taste, this bread is good to dip (and moisten) in just about any sauce. Yield: 8 corn rolls
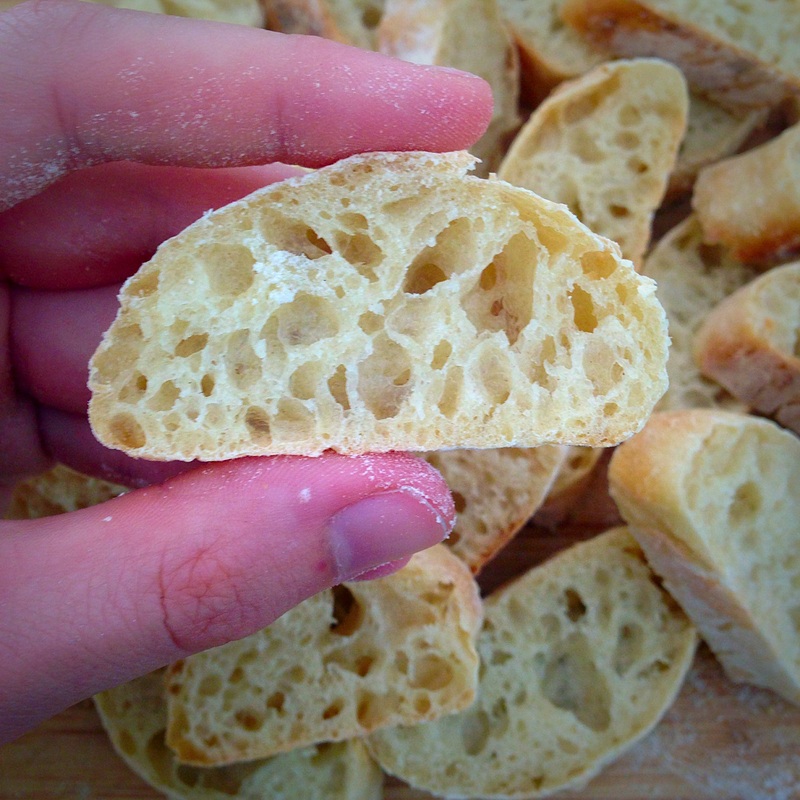
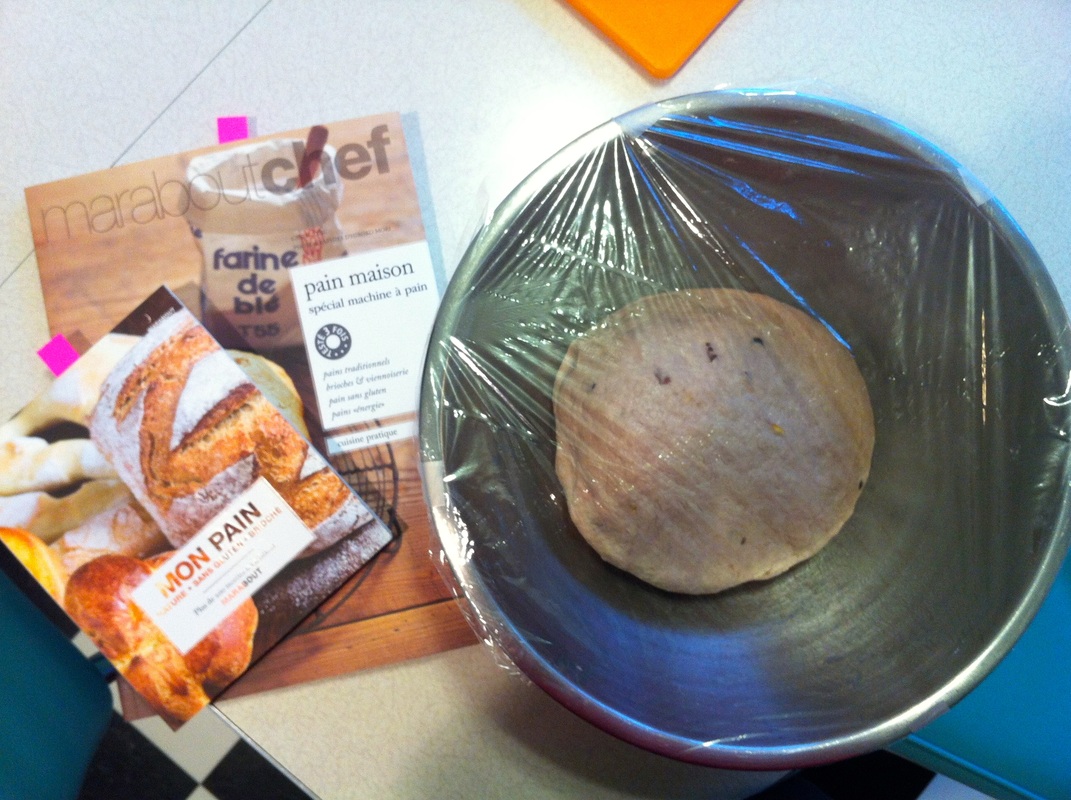
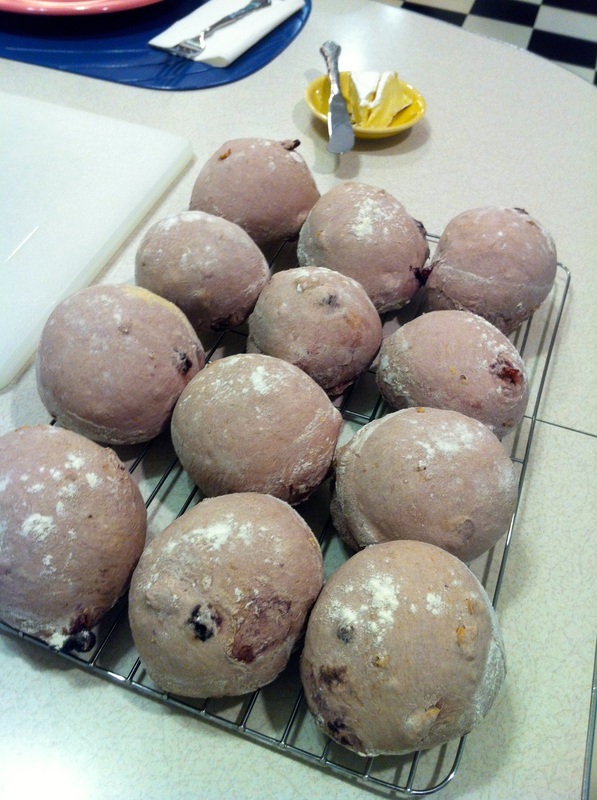
Ingredients: 350g all-purpose flour 180g corn flour 370g water 12g salt 4g instant yeast 28g corn meal (for underside of bread) Directions: 1) Mix all of the dough ingredients EXCEPT the salt and corn meal in a medium/large bowl— by hand or mixer — until it begins to form strands and come together. THEN add the salt. Continue to mix (about 2min) until a slightly sticky dough is formed. Transfer dough to a lightly floured surface and knead 3-5 minutes until smooth and silky. Depending on the conditions in your kitchen, you may need to add small amounts of water to make the dough more moist, or small amounts of the all-purpose flour to make it more kneadable. I would not add any more corn flour than is called for in the recipe. 2) Place the dough in a lightly greased bowl and cover with plastic wrap. Let rest in warm place for about 1 hour, until doubled. 3) Gently deflate the dough, and transfer it to a lightly floured surface. Divide the dough into 8 pieces and form into rounds. 4) Make a small mound of the corn meal on the counter. Place the rounds on a the corn meal and let it stick to the underside of the breads. Cover the breads and allow them let rest for 20-25 minutes (they will puff a little). Preheat the oven to 370°F. 5). Score the top of the breads in an "X" or however you wish, using scissors or a sharp knife. Using a pizza peel, load the breads directly onto the oven bricks (or pizza stone). NOTE: every oven cooks differently, so watch your buns after 10 minutes. The dough is already yellow, but will still become a darker golden-brown color when done. Most importantly, it should sound hollow when tapped on the underside. 6) Remove buns from oven and, after a few minutes, transfer to rack for cooling. NOTE: Due to lack of preservatives in the dough, the breads taste the best within the first few hours of baking. I would recommend freezing them if you plan to eat them more than one day after baking, as they will rapidly become stale. This is another bread that is largely influenced by the time I spent in France. I have several French bread books that I acquired from outdoor markets, and a red-wine bread exists in both of them--one pairs it with pecans in the dough, the other with walnuts. This bread has character, and tastes more 'yeasty' than other breads, perhaps because of the small amount of wine/alcohol that flavors the dough. It is tangy Yield: 12 red wine puffs
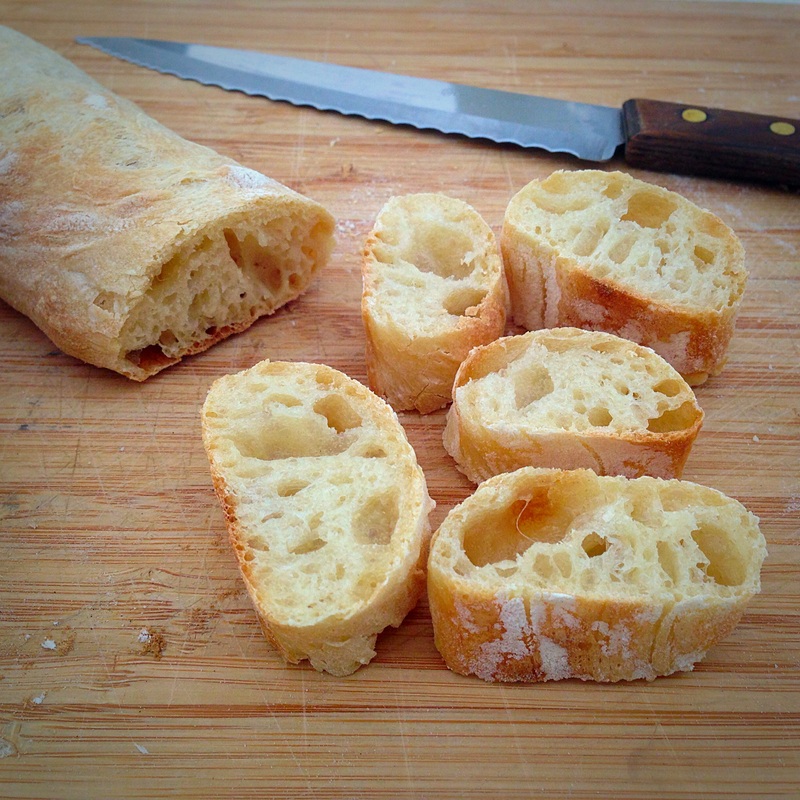
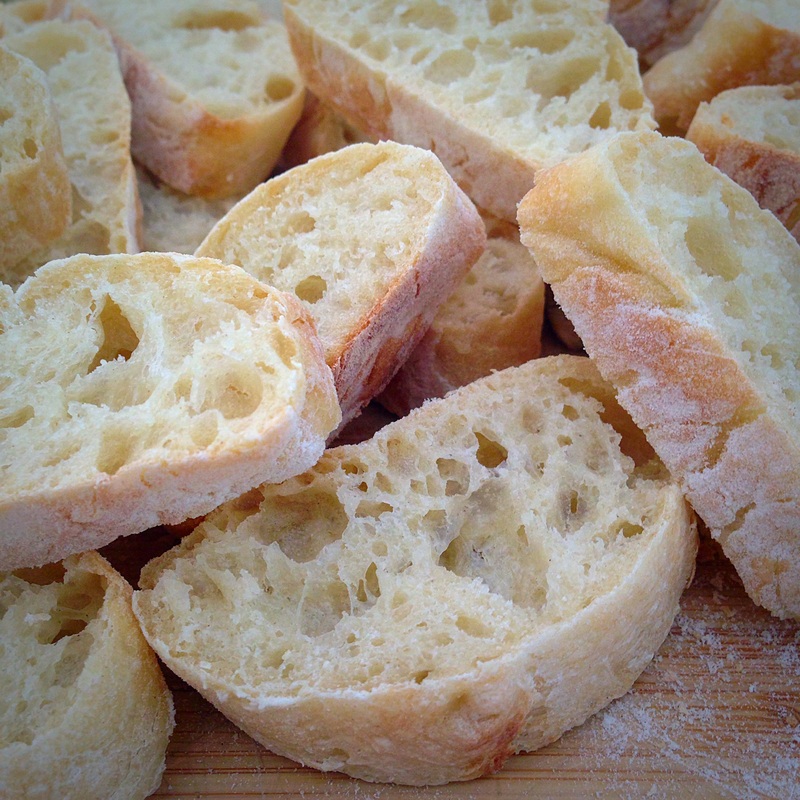
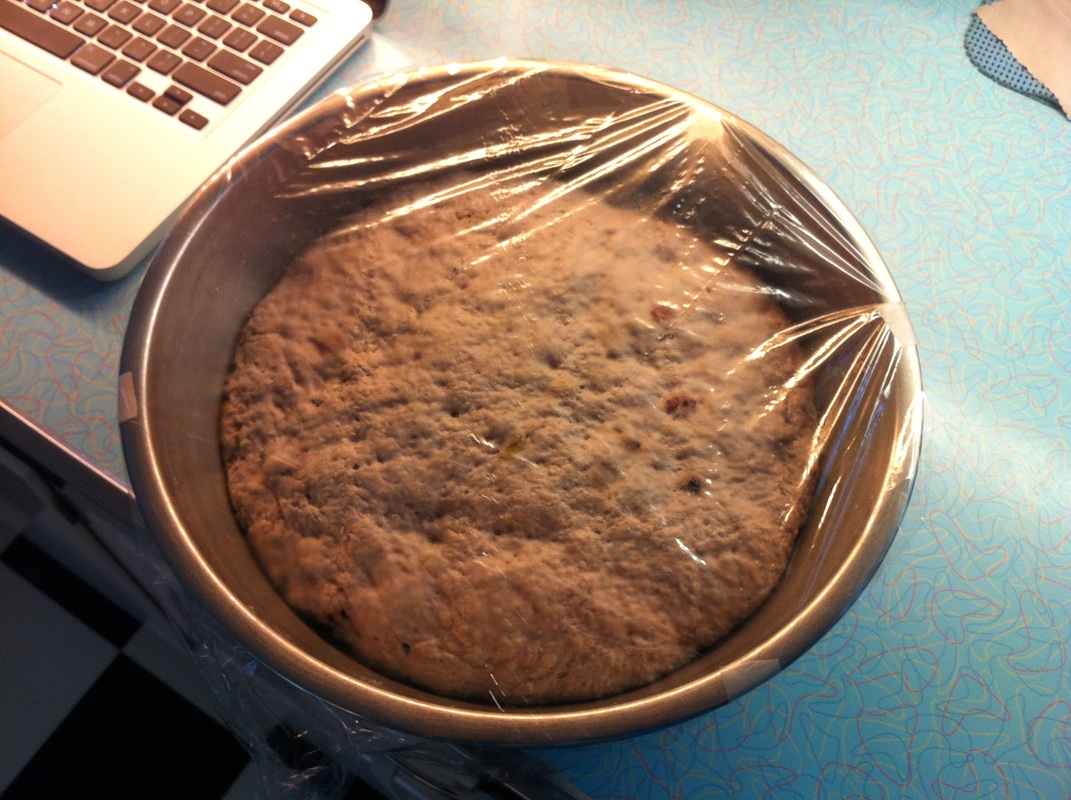
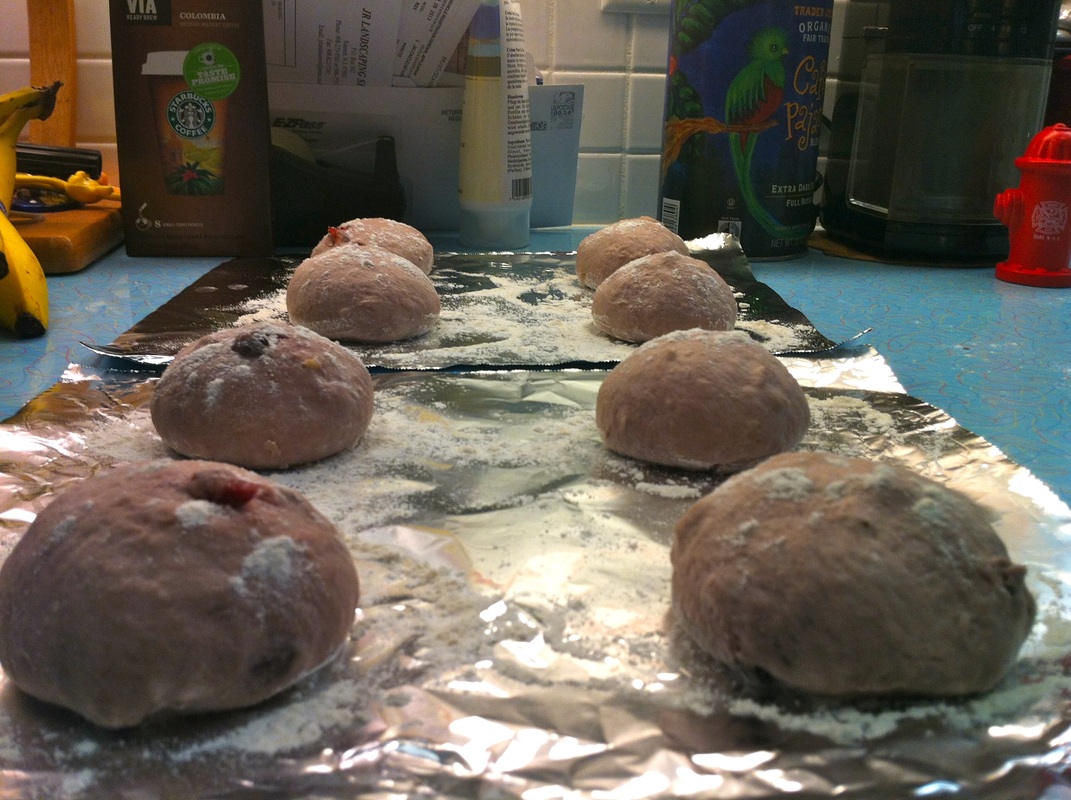
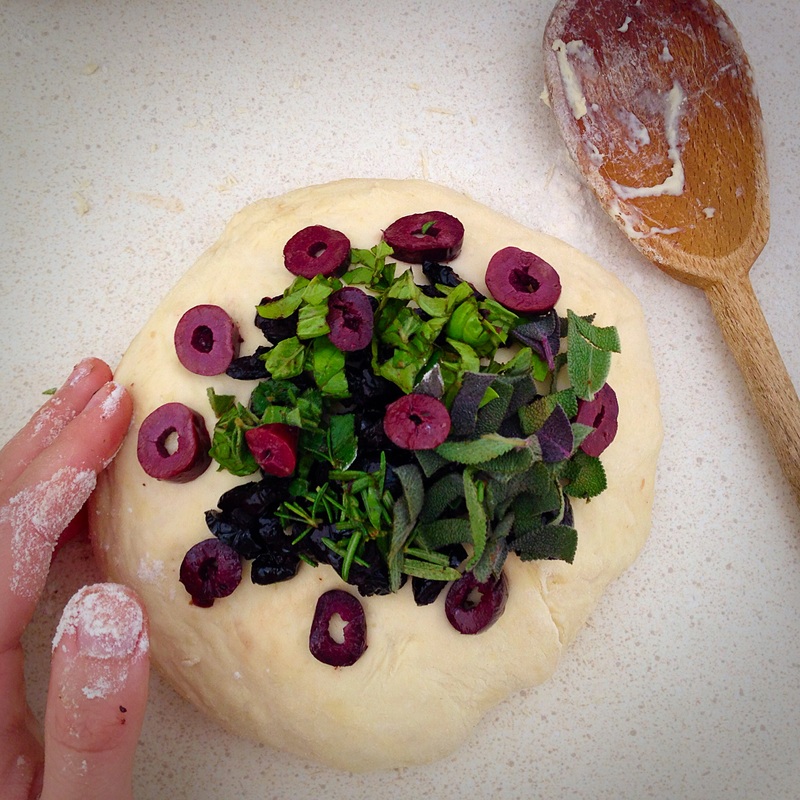
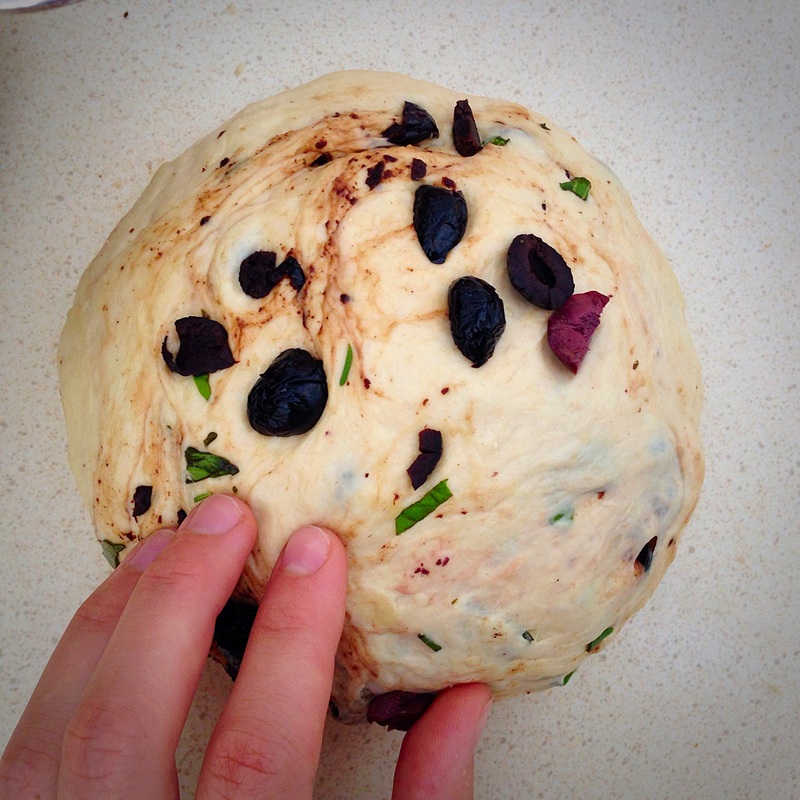
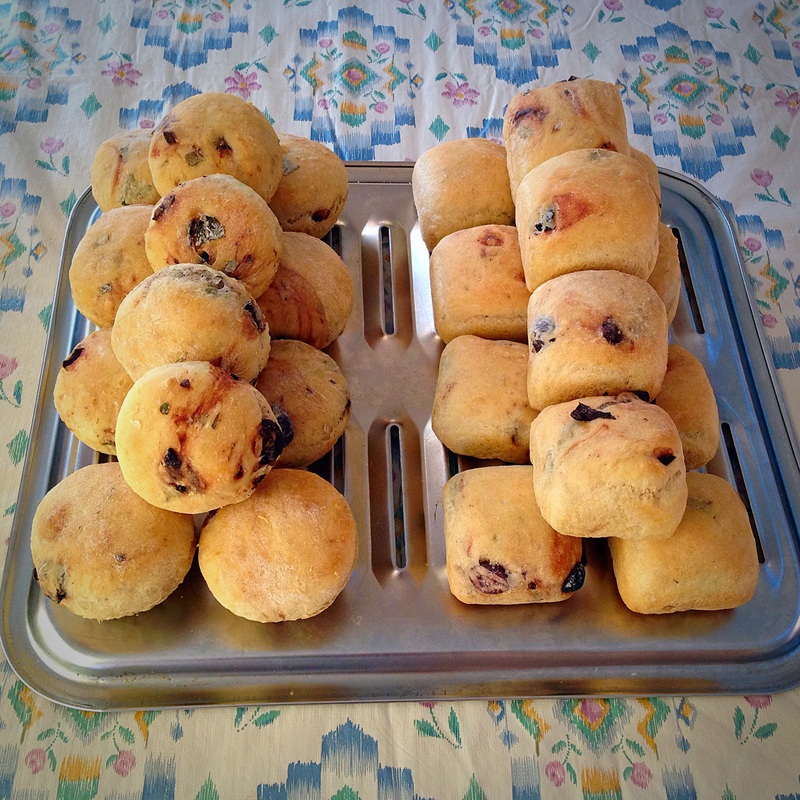
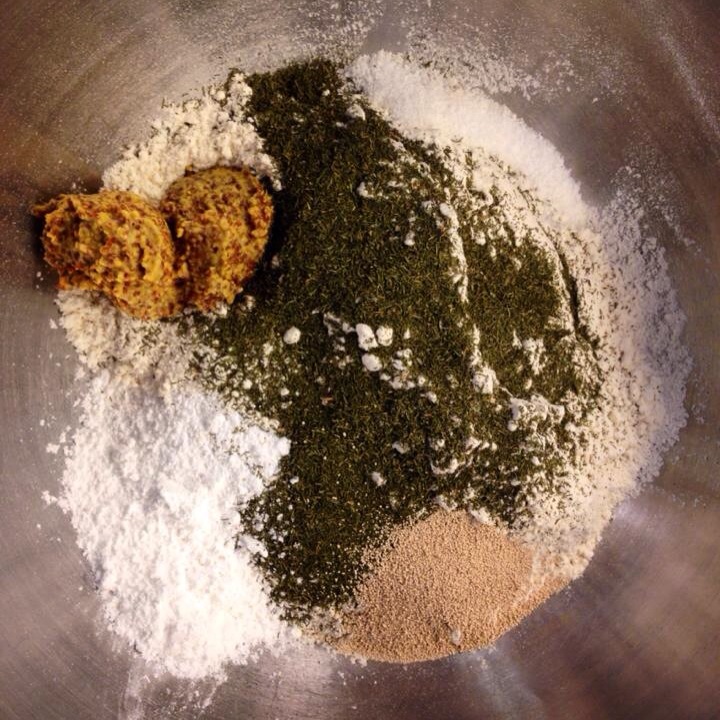
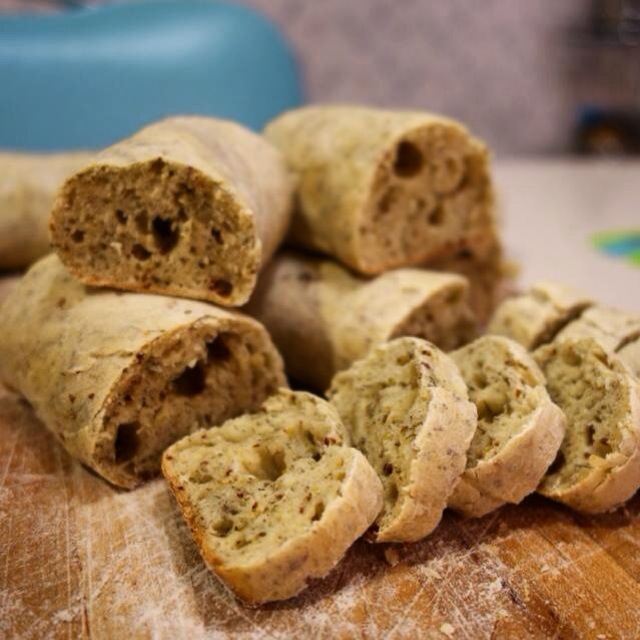
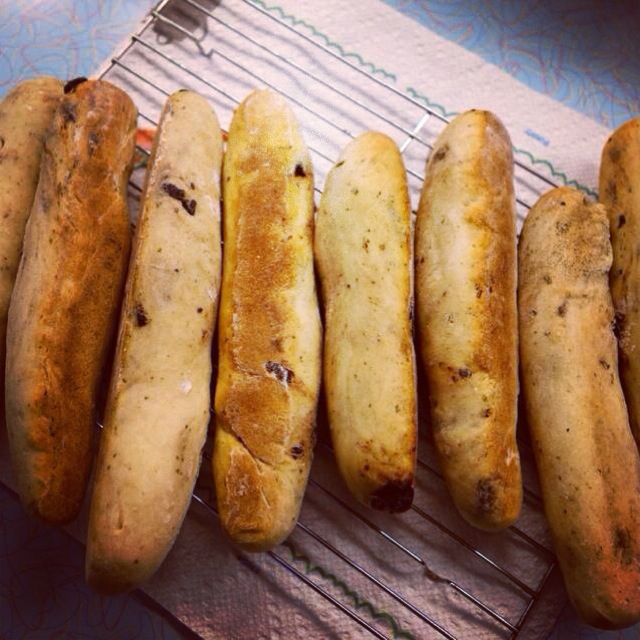
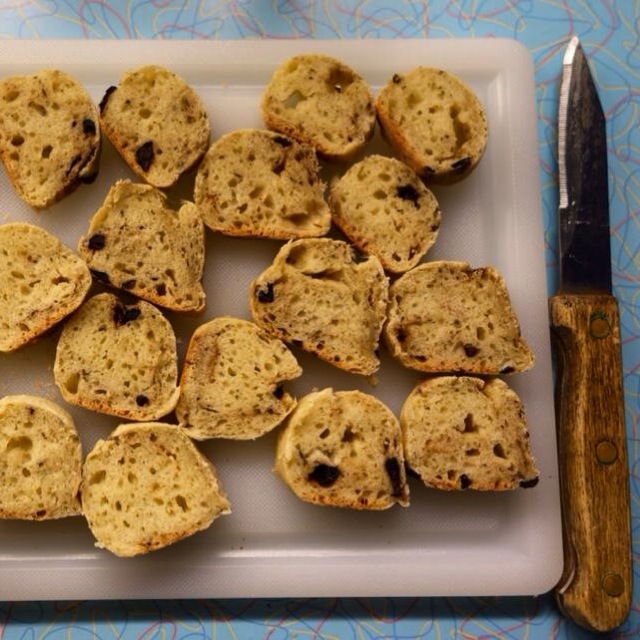
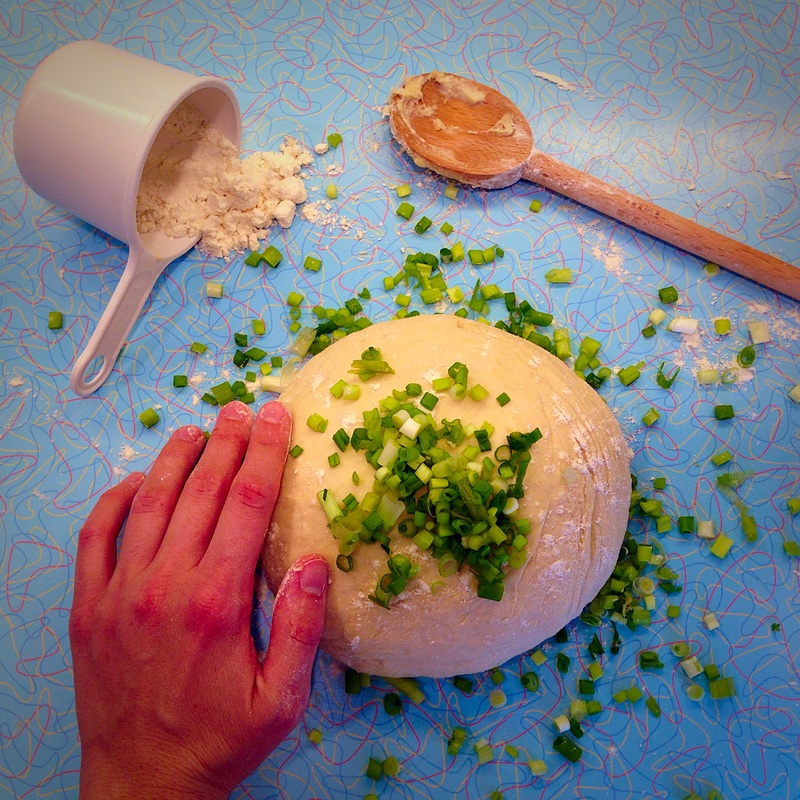
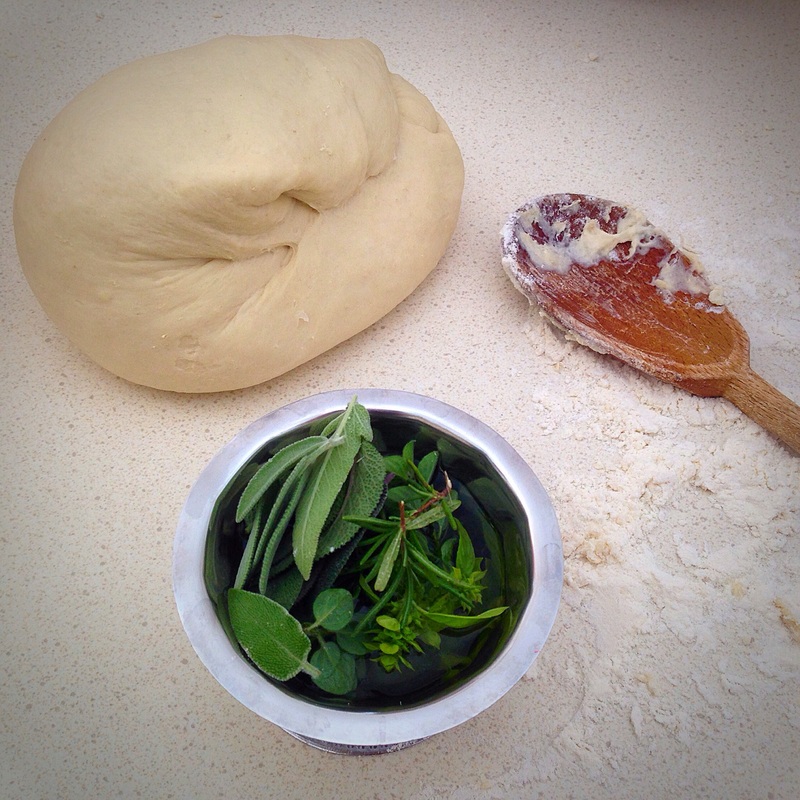
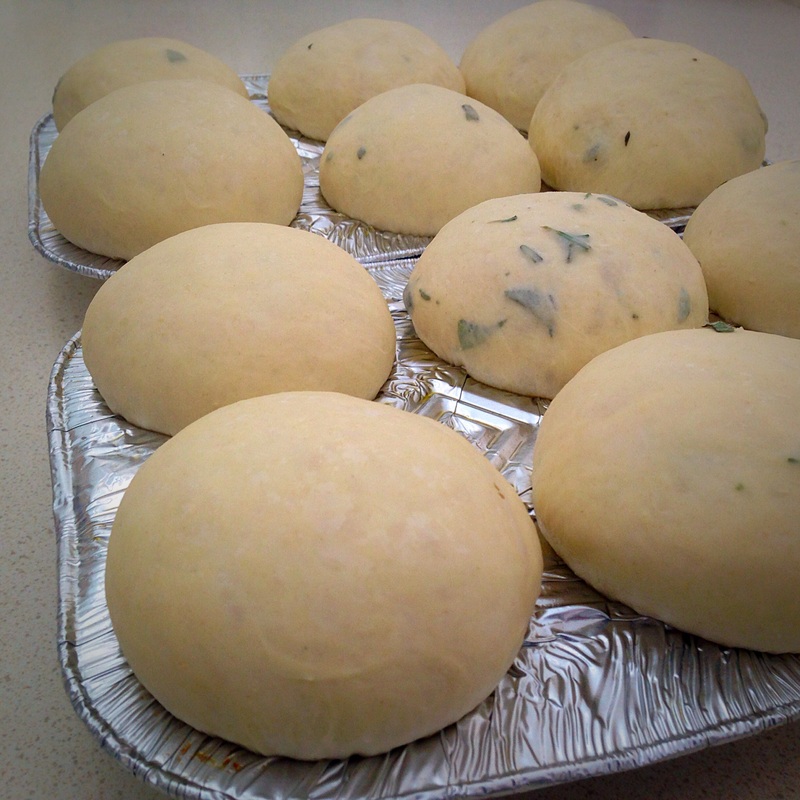
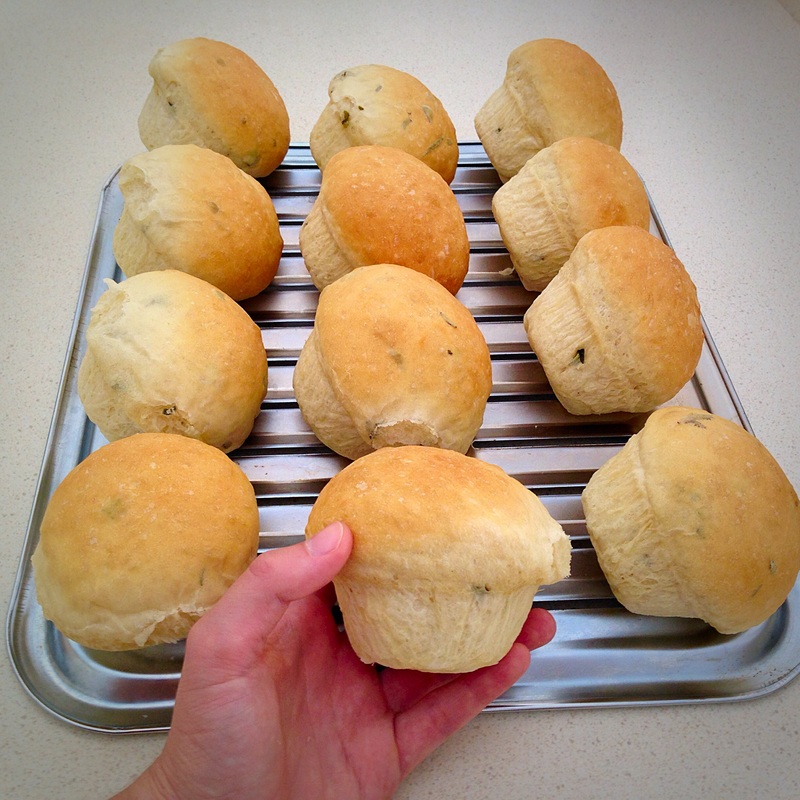
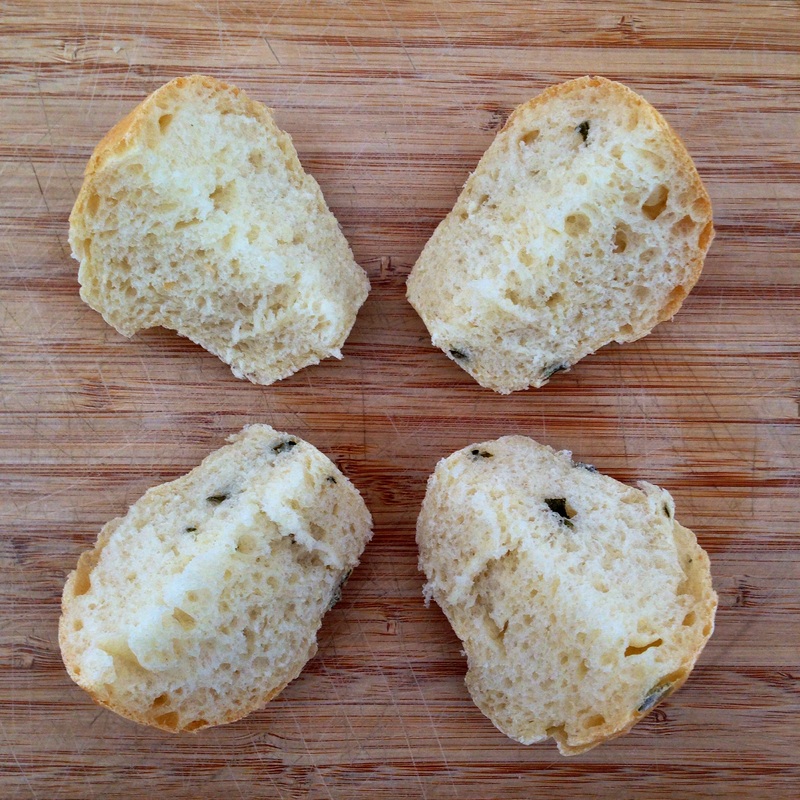
Ingredients: 450g all purpose flour 170 ml red wine (of your choice) 100 ml water 2 1/2 Tsp instant yeast 1 Tsp butter, softened 1 Tsp sugar 1 1/2 Tsp salt 35g walnuts coarsely chopped (sweetened, raw, or toasted--you can also substitute pecans) Directions: 1) In a bowl, pour the red wine, water, butter, sugar, and yeast into a bowl and gently stir (you can do this in a mixing machine if you prefer, I do this dough by hand). 2) Slowly add flour, and stir together until a dough begins to form. Then add the salt and continue to stir/mix. Transfer dough to a lightly floured surface and knead until smooth and silky (about 5min). The dough will have a pale pink color. At this time, put the walnuts on the counter and on top of the dough and knead them into the dough until incorporated. 3) Place dough in a lightly greased medium/large bowl and cover with plastic wrap. Place bowl in a warm place for proofing for about 1.5-2hrs, or until doubled in bulk. Some people run the dishwasher and place the dough in that warm, humid environment. I have also set my oven to 200F for a few minutes and turn it off; then I wait for a few minutes and place my covered bowl in the warmed oven. 4) Remove the puffy dough from the oven and empty onto a lightly floured surface. Gently pat the dough and divide dough into 12 pieces (you can use a scale to weigh each piece for even baking times). 5) For each of the 12 pieces of dough, bring all of the corners of dough together to the center and pinch to form a ball. Roll the ball on the counter seem-side down to form a smooth ball. Leave the 12 rounds on the floured counter and cover with plastic wrap. Let the rounds of dough rest 30 minutes--they will grow a bit more. 6) Preheat oven to 375F. I prefer to use a pizza peel to load these breads onto a stone at the bottom of the oven. However you can also place the rounds on a lightly greased baking sheet or pizza pan and place them on a lower or middle shelf. 7) Bake the breads for 25-30 minutes. NOTE: every oven cooks differently, so assess the breads after 10-15 minutes. The slightly pink puffs should be golden/brown when done, and should sound hollow when tapped on the underside. 8) Remove buns from oven and, after a few minutes, transfer to rack for cooling. NOTE: Due to lack of preservatives in the dough, the breads taste the best within the first few hours of baking. I would recommend freezing them if you plan to eat them more than one day after baking, as they will rapidly become stale. This dough was really airy and flaky, with a beautiful crumb. It's actually the bread that is featured in the large photo on the home page. I chose to put olives and fresh backyard herbs in this dough. I think it is capable of holding a lot of different ingredients, but this night in particular I wanted to do olives and herbs. You almost can't go wrong with that... Yield: 12 olive rolls
Ingredients: 1 cup lukewarm water 1/4 cup milk 3 cups flour 2 tablespoons olive oil 2-3 tablespoons herbs (the amount and type are your choice!) 1 teaspoon salt 1.5 teaspoons instant yeast Directions: 1) Combine all of the ingredients, mix, and knead (my preference is always by hand because that's how I was taught), mixer, or bread machine set on the dough cycle — until smooth, adding additional water or flour as needed. Add the salt last, as the dough begins to form ropes/clumps. 2) Cover the dough, and let it rise for 1 hour. 3) Divide the dough into 4 pieces, shape into logs, and place in lightly greased mini loaf pans. For one large loaf, shape the entire piece of dough into a log and place in a lightly greased 9" x 5" loaf pan. 4) Cover and let rise until the dough has crowned about ½" over the rims of the mini loaf pans, or 1" over the rim of the larger pan, 30 minutes to 1 hour, depending on the warmth of the kitchen. Towards the end of the rising time, preheat the oven to 350°F. 5) Bake the bread for 30 to 35 minutes for the mini loaves, 35 to 40 minutes for the larger loaf. An instant-read thermometer, inserted into the center of a loaf, should register at least 190°F. Tent the bread lightly with foil if it appears to be browning too quickly. 6) Remove the bread from the oven, turn it out of the pan, and cool on a rack. NOTE: Due to lack of preservatives in the dough, the rolls will taste the best within the first few hours of baking. I would recommend freezing them if you plan to eat them more than one day after baking, as they will rapidly become stale. UNDER CONSTRUCTION UNDER CONSTRUCTION
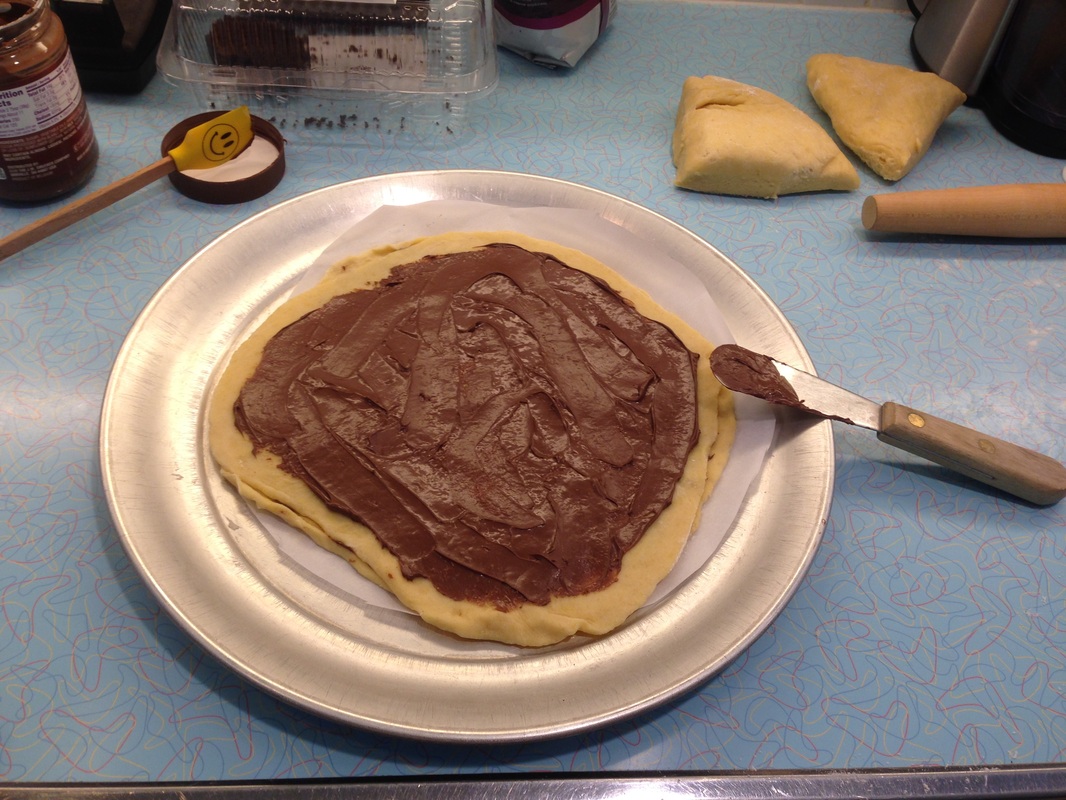
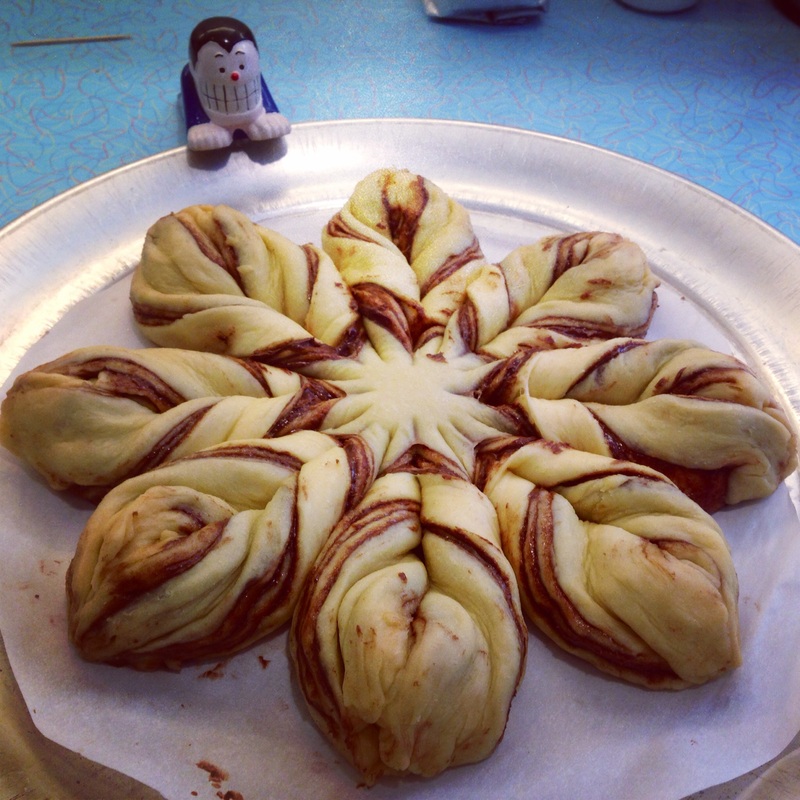
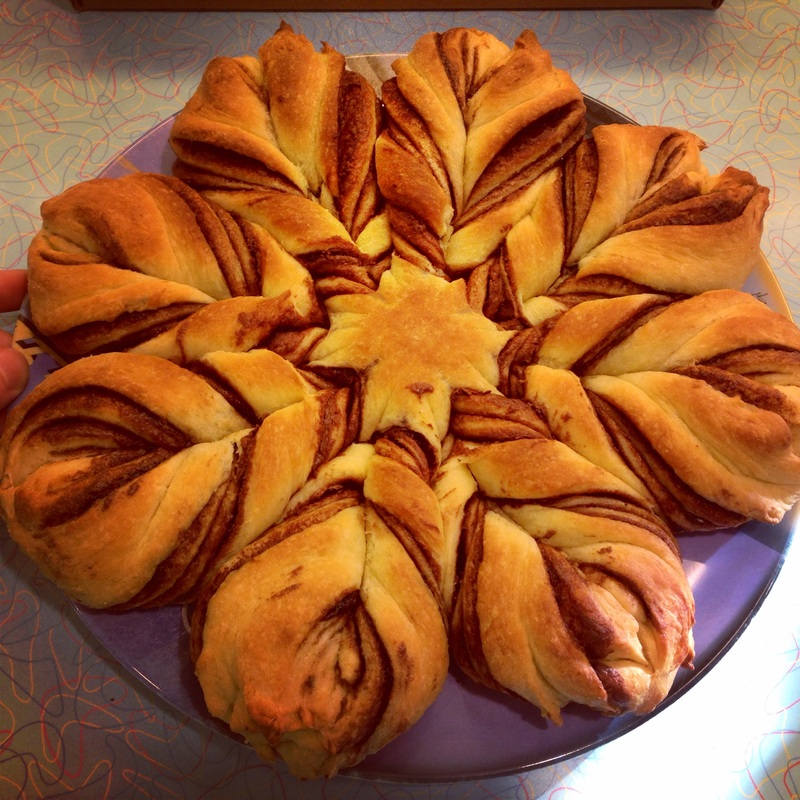
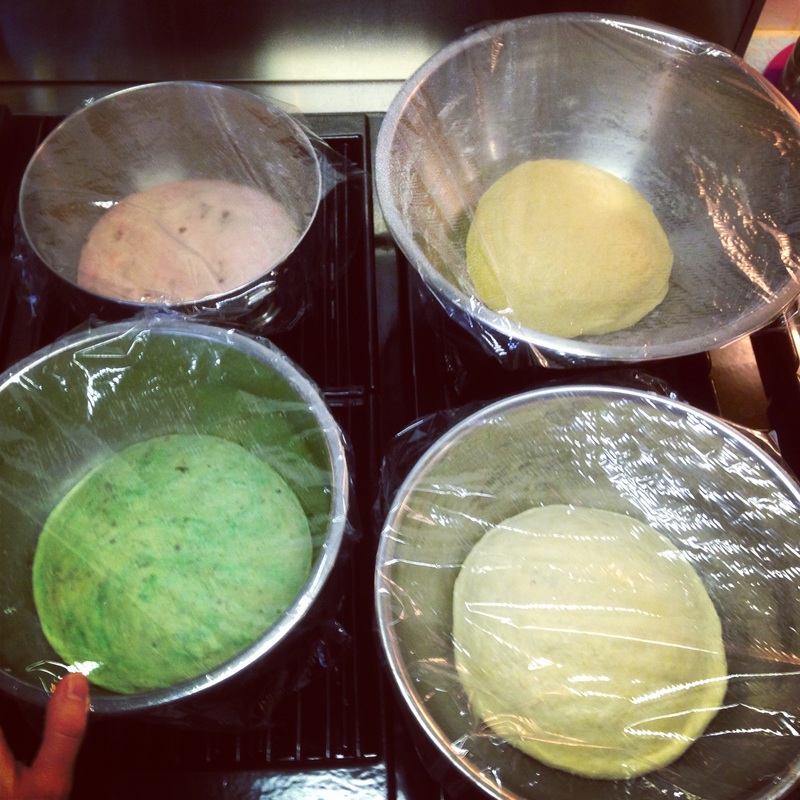
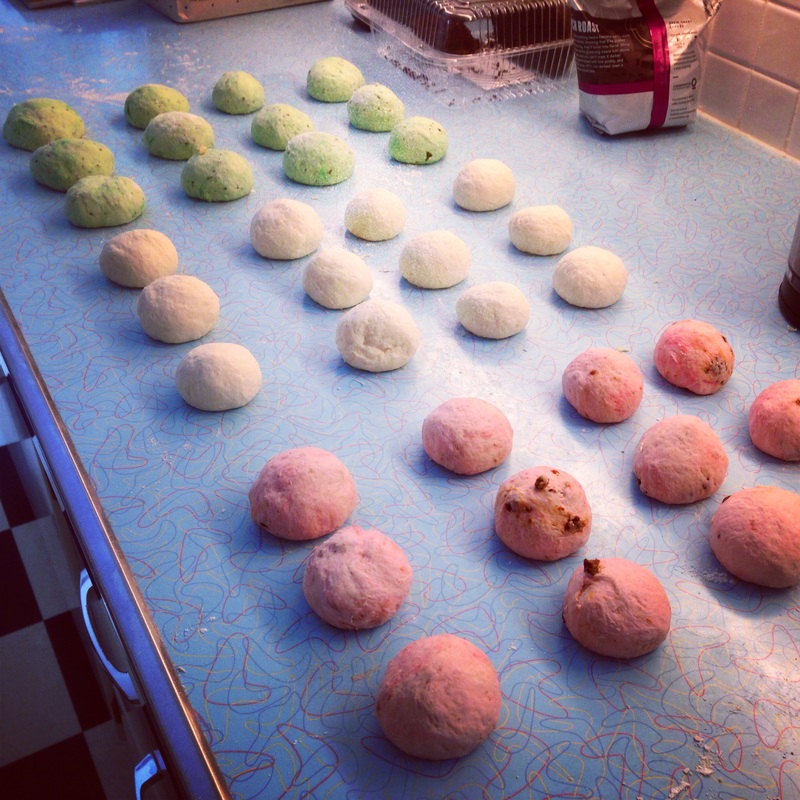
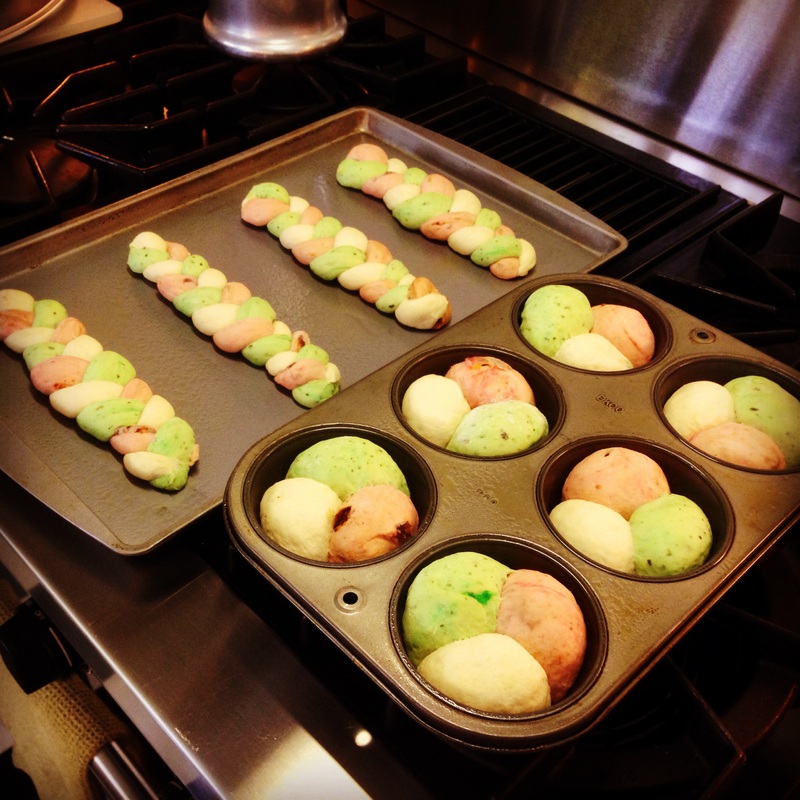
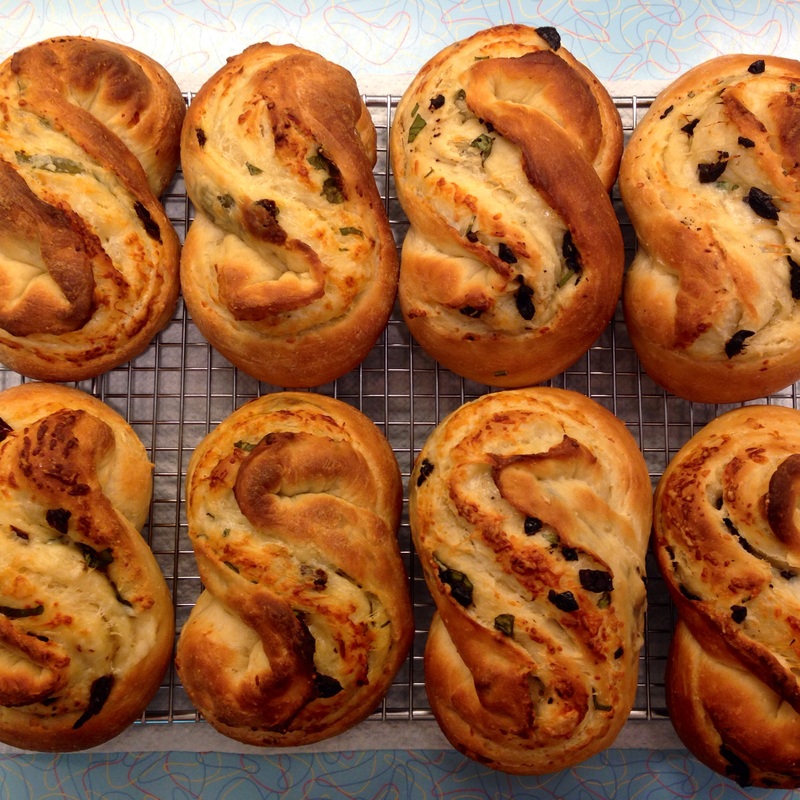
NOTE: Due to lack of preservatives in the dough, the breads taste the best within the first few hours of baking. I would recommend freezing them if you plan to eat them more than one day after baking, as they will rapidly become stale. This is, admittedly, my favorite bread to make on the whole website. It is not technically difficult, but it does take time and patience. I discovered the shape and saw it repeatedly on the accounts of Italian Instagrammers. So I researched on Google and YouTube and found a video (in Italian) that I could follow. I chose to use my own brioche dough recipe that I have found to be reliable and tasty. Ultimately, I combined my preferred dough with the video demo and have successfully made multiple crowd-pleasing brioche flowers. For shaping, it is important to use dough that is chilled. As you are adding Nutella to the layers of dough, they may soften. After you complete the layering process, I recommend chilling the dough for 10-15 minutes in the refrigerator. This will make it infinitely easier to make the appropriate cuts, while keeping the bread looking clean and esthetic (no oozing!). Good luck! Buona fortuna! Yield: 1 large Nutella brioche flower Ingredients: For dough: 3 - 3 1/2 cups all-purpose flour 3 Tbsp sugar 1 1/4 Tsp salt 1 tbsp instant yeast 3 large eggs* 1/4 cup milk 10 Tbsp butter, softened *You can save the white of a 4th egg to brush on the buns if you plan to top them with sugar 1 piece of parchment paper + 1 cookie sheet or pizza dish For layers: 1 medium-large jar of Nutella Directions: 1) In a mixer or bread machine (programmed for dough), mix together 3 cups of flour and the rest of the ingredients to form a smooth dough. It will be sticky at first and may require the extra 1/2 cup flour to make the dough come together if the conditions in your kitchen differ (temperature, humidity, etc). Remove from mixer and knead with your hands until silky smooth. 2) Form the dough into a ball. Place it in a greased bowl and let rise for ~1-1.5 hrs--it will become quite puffy. Refrigerate the dough for at least 1 hour (until chilled), or as long as overnight. This will slow the fermentation process and will make the dough easier to braid/shape. 3) To achieve this particular flower shape, I took the dough out of the refrigerator and divided it into 4 even pieces. The video below is in Italian (all you have to do is watch the technique), and you can skip through some of the first parts where she describes how to make the brioche--I have provided a recipe above. You can shape the dough just as she does shown in the video below. NOTE: I DO recommend refrigerating the dough once more for 15-20 minutes BEFORE making the 16 cuts. If the dough (full of butter) begins to get warm and melt as you work, it will be more difficult to cut...and messy. 4) Let your finished, braided product rest on top of the parchment paper in the pizza dish/cookie sheet for about 30 minutes (it will puff a little more). 5) Preheat the oven to 375F. Right before the bread is cooked, you can brush it the egg white of a 4th egg. 6) Place cookie sheet or pizza pan in oven and bake for about 30-35min. NOTE: watch the bread. Every oven cooks differently. The buttery dough should a golden brown on all of the petals and center when done. 7) Remove from oven and let cool for about 15min. Carefully transfer to rack for cooling. You can sprinkle confectioner's sugar on top for an added effect, but it will still look beautiful without it. NOTE: Due to lack of preservatives in the dough, the bread tastes the best within the first few hours of baking. I would recommend freezing it if you plan to eat it more than one day after baking, as it will rapidly become stale. This dough produces a crispy crust, inner moisture, predictability of the final shape, AND it holds flavors very well. I saw a similar bread on an Italian chef's Instagram account, and when I asked how he did it, I never received a response. So this is my way of recreating what I saw. I used pesto and sun dried tomatoes to create the red + green. The white bread is just the unseasoned dough itself. You can braid tricolor doughs many ways....here I feature two. This bread takes a lot of cutting and dividing, but each bite is bursting with flavor. Yield: 8 braided breads
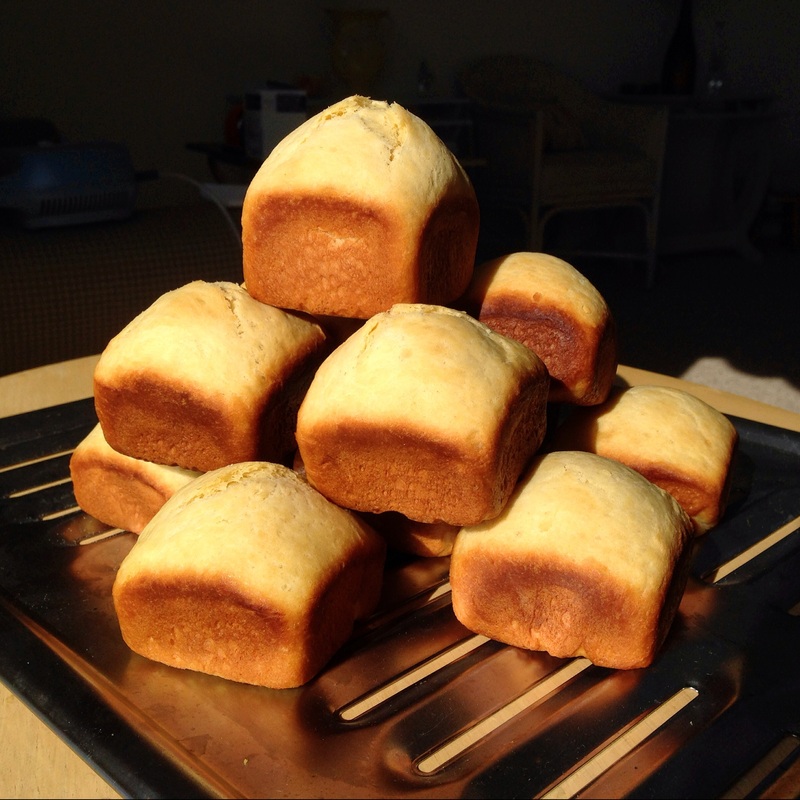
Ingredients: For the all the dough: 175ml water 200ml yogurt 1.5 Tsp salt 500g all-purpose flour 2 Tsp powdered sugar 1 1.4 Tsp instant yeast For the colored doughs (added later): 4 Tsp pesto 4 Tsp sun dried tomatos (in oil) Directions: 1) Place the sun dried tomatoes on a paper towel and allow the oil to drain from them. Mix all of the dough ingredients EXCEPT the salt in one medium/large bowl— by hand or mixer — until it begins to form strands and come together. THEN add the salt. Continue to mix (about 2min) until a slightly sticky dough is formed. Transfer dough to a lightly floured surface and knead 3-5 minutes until smooth and silky. 2) Divide the dough into 3 equal pieces. Designate one dough as the plain (white) dough. Knead the pesto into a second dough until fully incorporated. Knead the sun dried tomatoes into the other dough, until fully incorporated. 3) Place each dough in its own lightly greased bowl and cover with plastic wrap. Let rest in warm place for about 1 hour, until puffy and doubled. 4) Gently deflate the doughs, and transfer each to a lightly floured surface (keep them separate!). Divide each dough into 8 pieces (so your total will be 24 pieces). If you want to make breads that look like three scoops of sorbet (see photo above), roll each of the 24 pieces of dough into balls. Then, grease a muffin tin. Each muffin hole will get 3 balls--one of each color. They will rise and fuse together. If you want to make braided tri-color bread, form each of the 24 pieces into ropes of the same thickness and length (as you desire, but be consistent). Pinch a red, green, and white rope together at one end and do a simple braid, bringing the outside strands over the middle strand, repeatedly. Then, place the finished tri-color braids on a greased cookie sheet, about 2" apart. 5) No matter what the shape you decided to make, cover and let rest for 20 minutes (they will puff a little). Preheat the oven to 370°F. 6) Place breads in oven for 20-25min. All ovens cook differently, so keep your eyes on the bread intermittently. They should become slightly brown on top, and will sound hollow when tapped on the underside. Transfer to rack for cooling. NOTE: Due to lack of preservatives in the dough, the breads taste the best within the first few hours of baking. I would recommend freezing them if you plan to eat them more than one day after baking, as they will rapidly become stale. One of my Puerto Rican friends suggested I try to make this bread, so I did some research. Traditionally the bread is made into snail-like swirls, but I had a new square pan I wanted to use..so, naturally, mine were square. The dough has enough butter and eggs in it to resemble brioche, but by nature of its Puerto Rican origins, I can't call this brioche. Yield: 12 buns
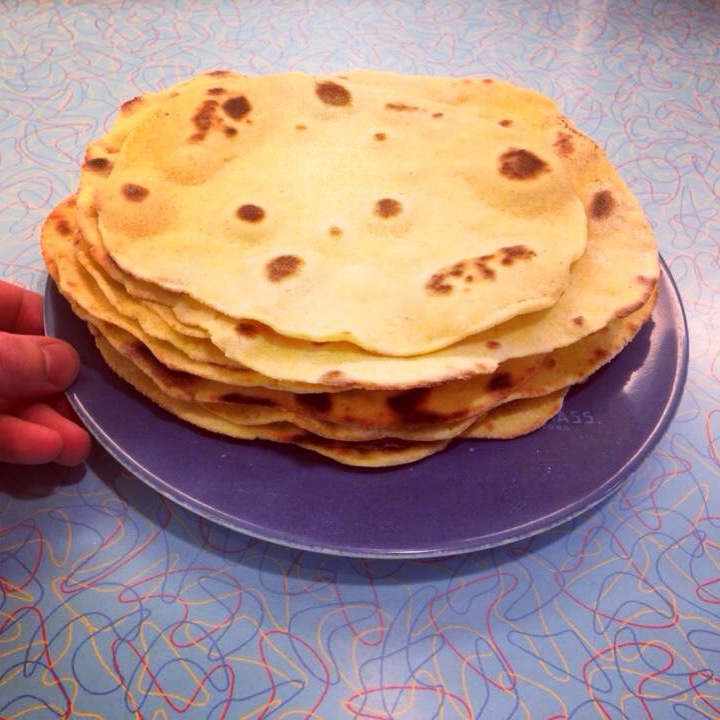
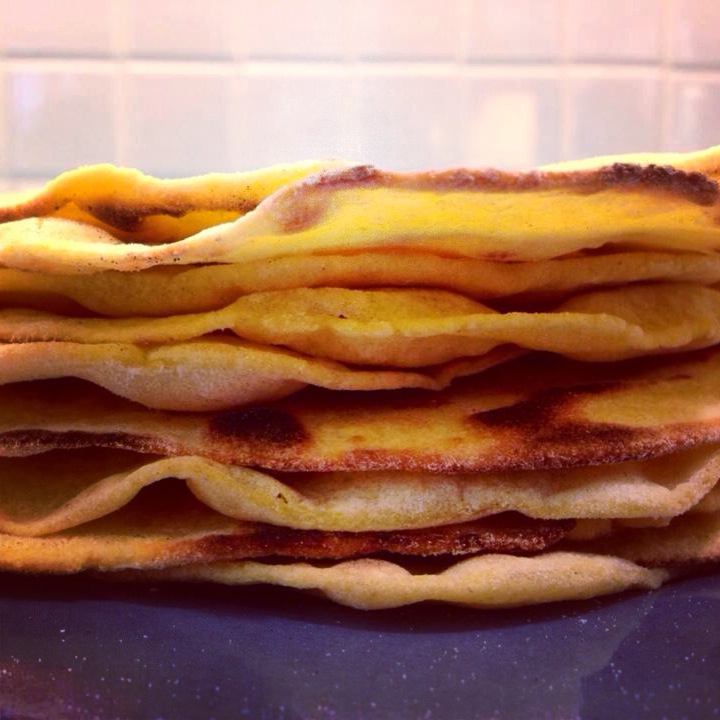
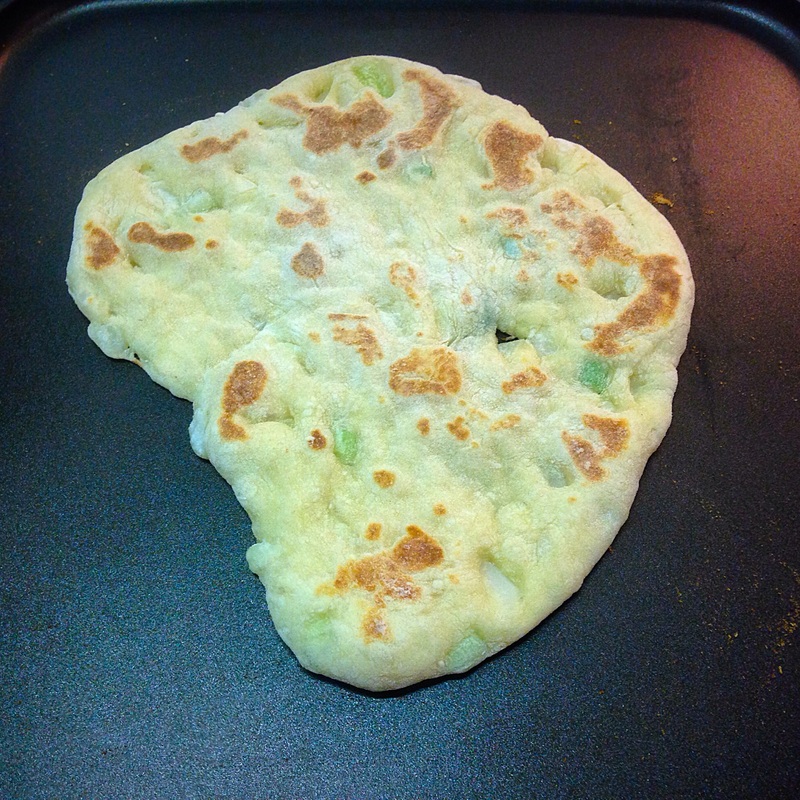
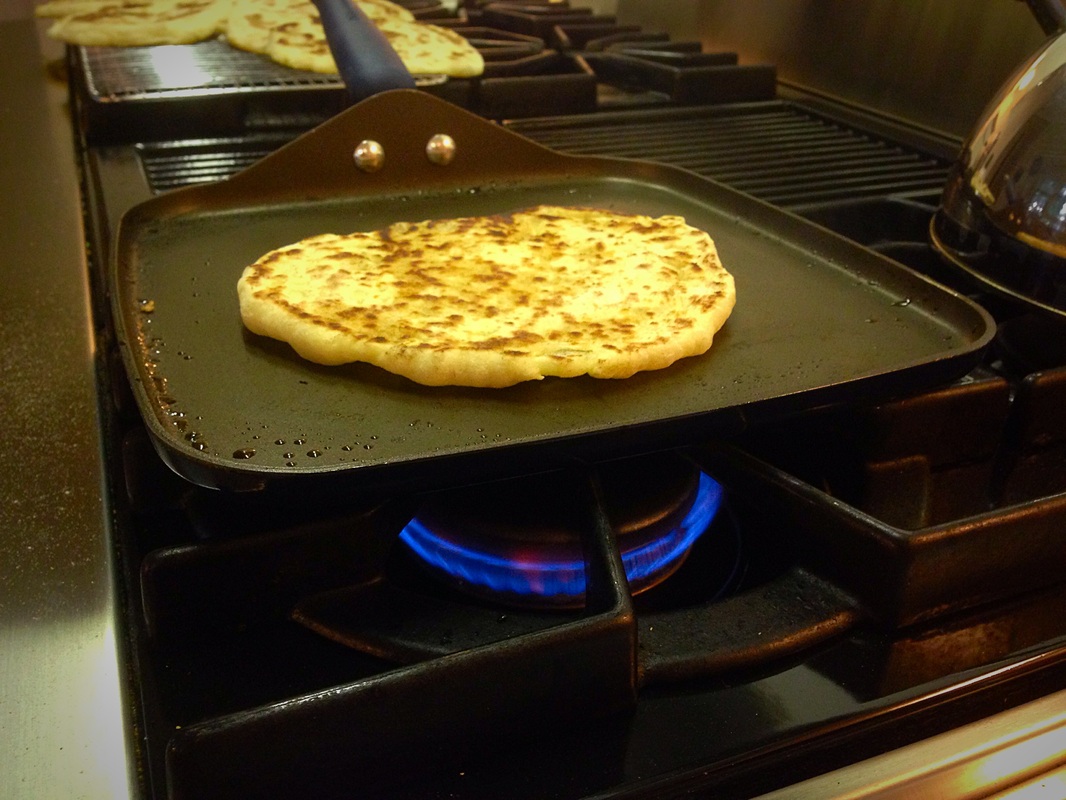
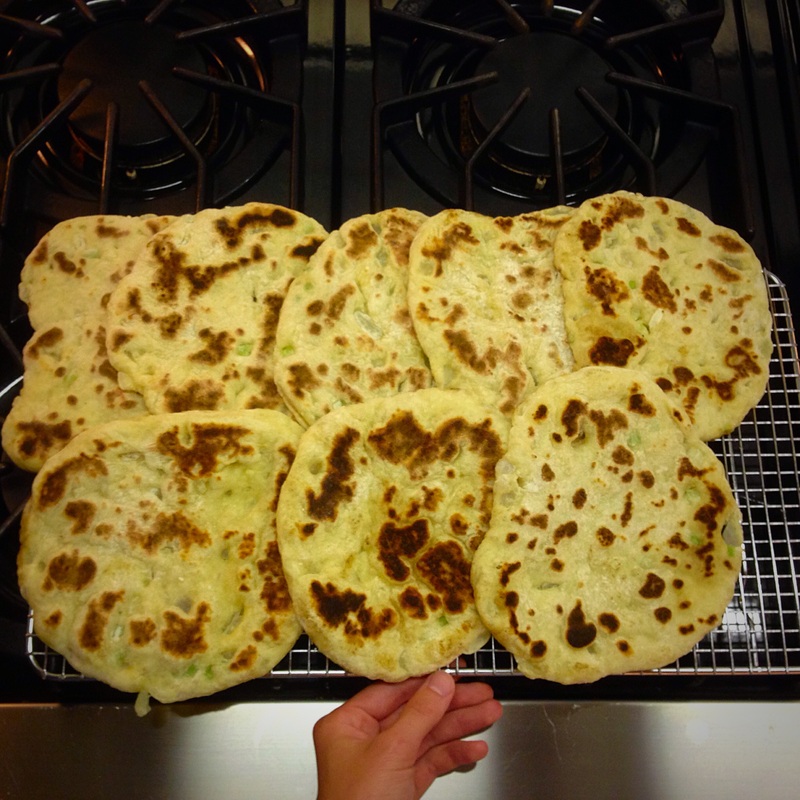
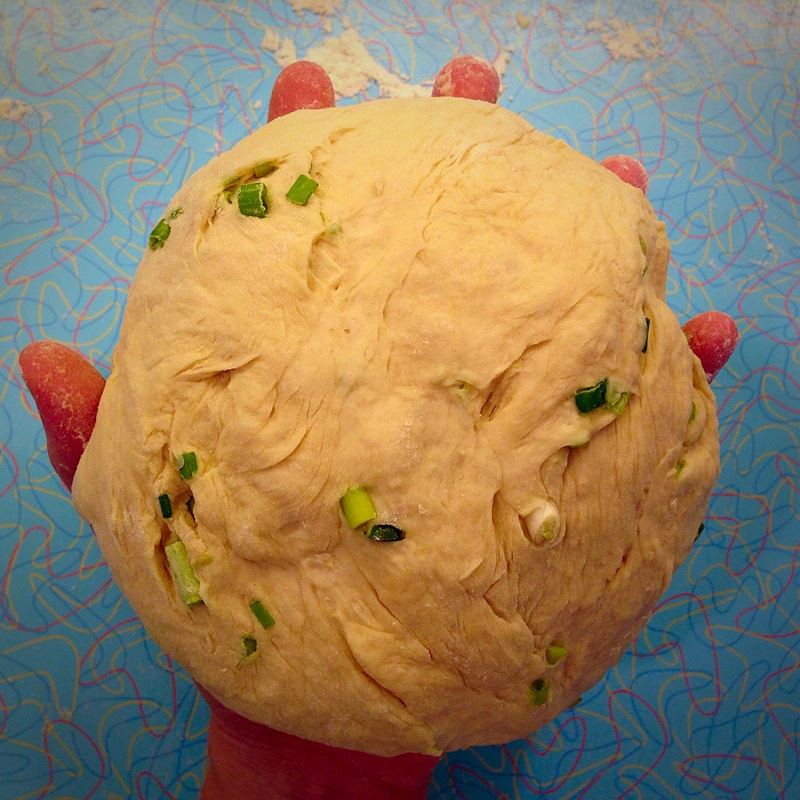
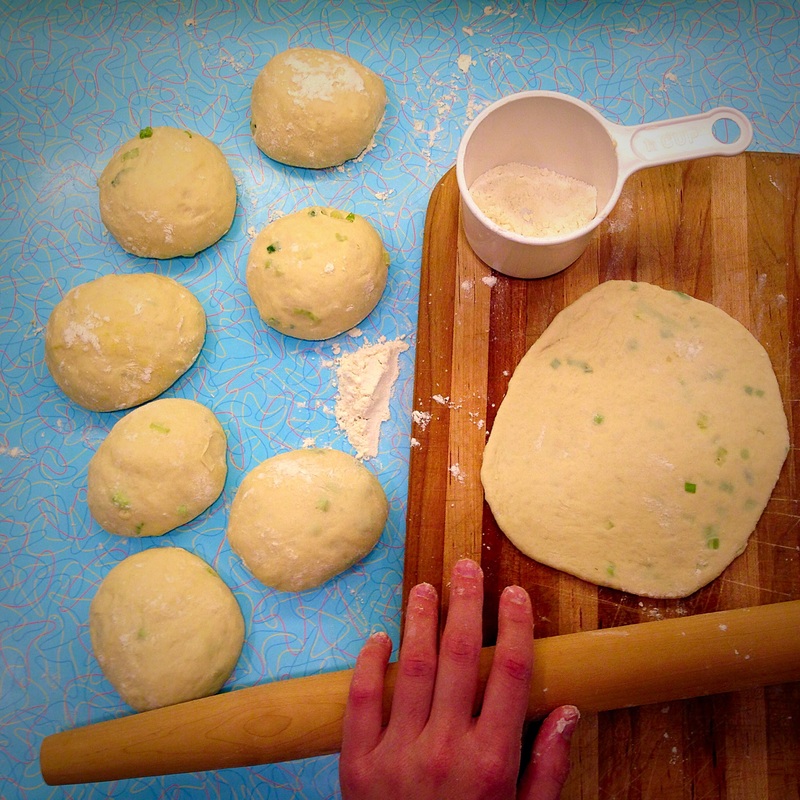
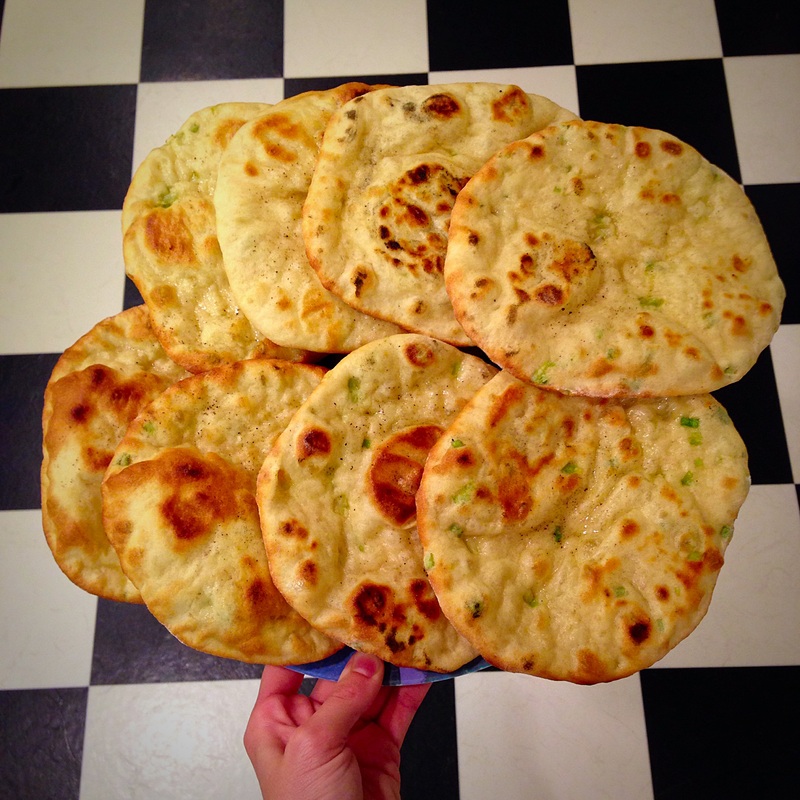
Ingredients: 4 1/2 cups all purpose flour 2 1/4 Tsp instant yeast 1 cup milk 1 cup warm water 3/4 cup sugar 6 egg yolks 16 Tbsp butter, melted Directions: 1) In a mixing bowl, add water and milk. Then add yeast, sugar, and 1 cup of the flour and stir. Set aside this mixture for 45-60 minutes. 2) Add the egg yolks to the mixture, and stir, blending very well. Continue to stir and add the rest of the flour one cup at a time. 3) Add 8 Tbsp melted butter and mix until butter is incorporated and dough is sticky. Cover and set aside until dough has doubled in bulk, about 1 hour. 4) Transfer dough to lightly floured work area. Divide dough into 12 pieces. For swirls: Roll or pat each piece into a rough rectangle. Paint the top surface of rounds with remaining melted butter, and roll into a long rope. Form the rope into a coil, with the inner end tucked in. Place on a lightly greased cookie sheet. For buns: flatten pieces into rounds. Paint top surface of rounds with remaining melted butter. Roll the rounds into balls and place in a lightly greased muffin/baking/cookie sheet. 5) Cover and let rolls rise until they have doubled in size. 6) Preheat oven to 375F and bake for about 12-15 minutes. Cool on cooling rack and dust with powdered sugar. NOTE: every oven cooks differently, so watch your buns after 10 minutes. The buttery dough should be a golden/deep brown when done, and should sound hollow when tapped on the underside. NOTE: Due to lack of preservatives in the dough, the breads taste the best within the first few hours of baking. I would recommend freezing them if you plan to eat them more than one day after baking, as they will rapidly become stale. I think pitas are some of the easiest, quickest flat breads you can make. And whether they puff ideally or not, they still taste great in the end and go with just about any dip you can imagine. In the pictures I show here, I had incorporated some scallions (1-2 Tbsp) into the dough. But you can leave them out, I have made many plain batches and they are delicious that way. Yield: 8 medium pitas
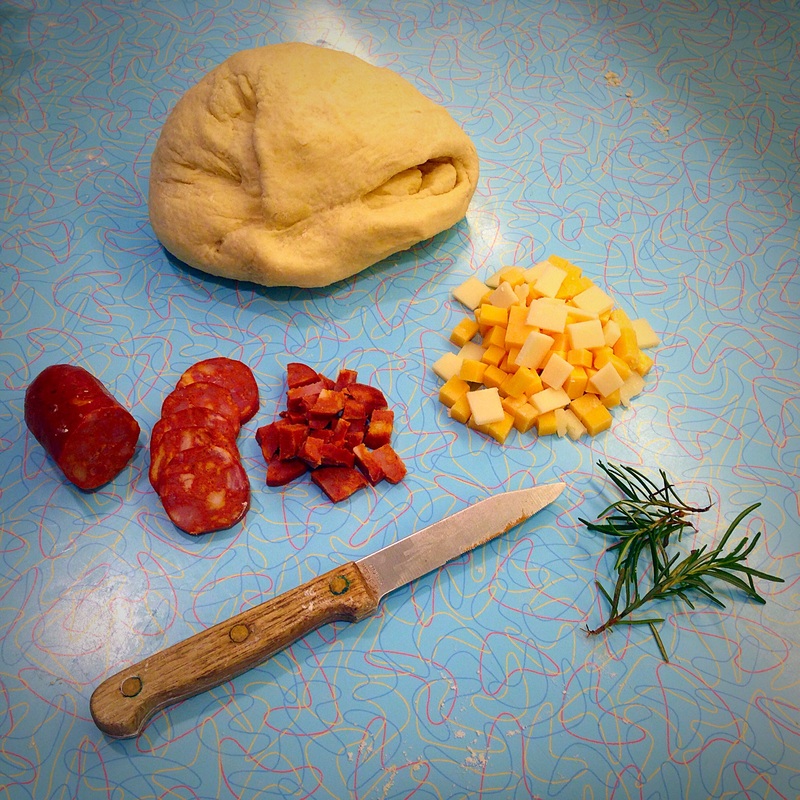
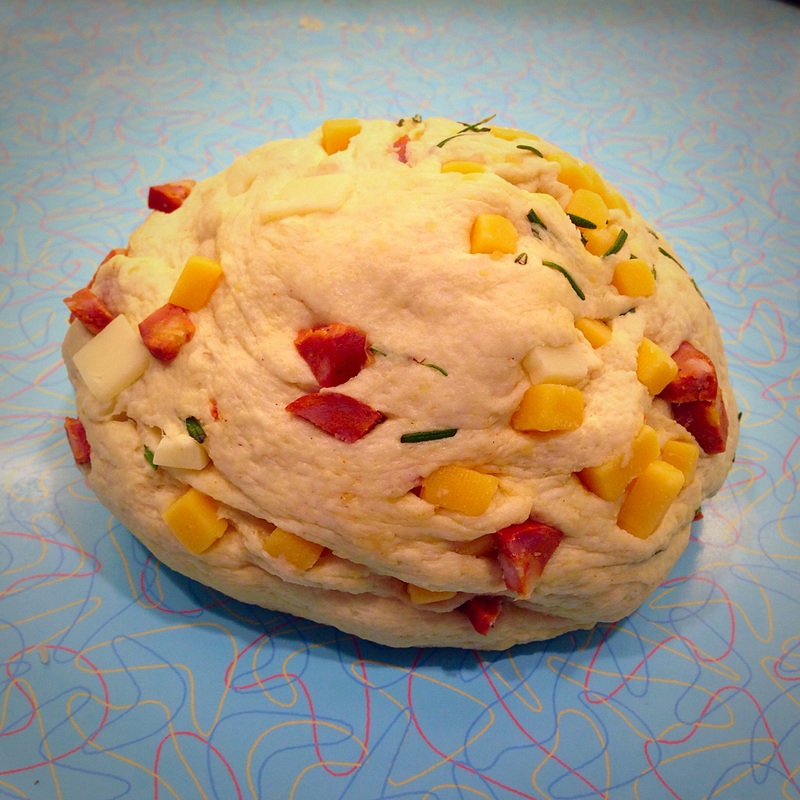
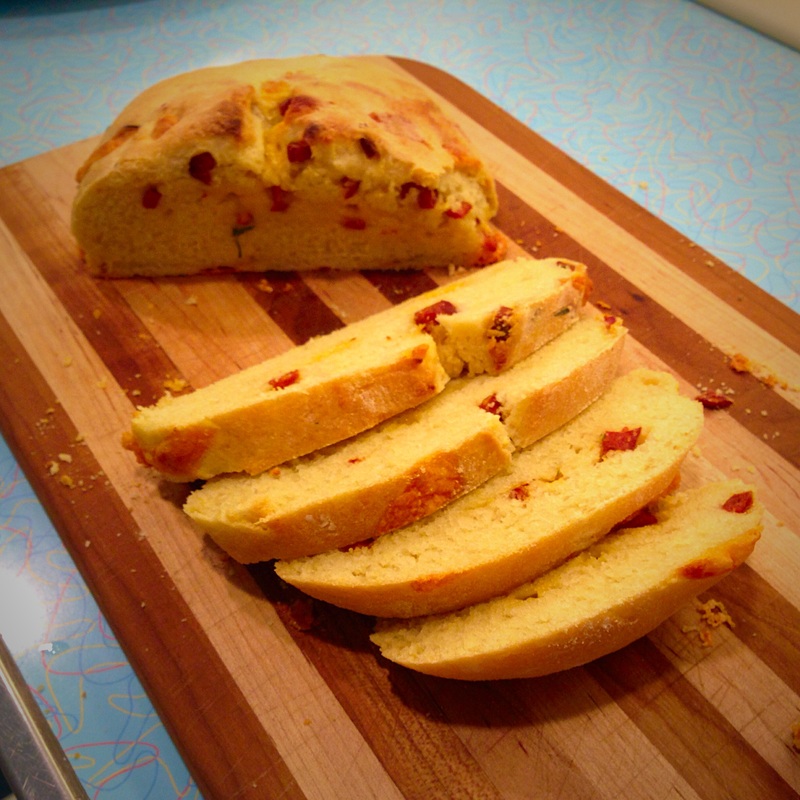
Ingredients: 3 cups (12 3/4 ounces) all-purpose Flour 2 teaspoons instant yeast 2 teaspoons sugar 1 1/4 teaspoons salt 1 cup (8 ounces) water 2 tablespoons olive oil For brushing after baking: 2 Tbsp melted butter or Olive oil Directions: 1) Combine and knead all ingredients until smooth and silky (I prefer to knead by hand, but you can use mixer and bread machine if you prefer). Lightly grease large bowl and cover. Let the dough rest 60 minutes until it's quite puffy (not necessarily double in bulk). 2) Turn the dough onto a lightly oiled work surface and divide it into 8 pieces. Roll the pieces into balls and let rest 15 minutes. 3) Use a rolling pin to flatten several balls into 6" rounds. Let the rounds rest, uncovered, for 20 minutes, while you preheat your oven to 500°F. Make sure that as soon as you put your first pitas in your oven, the next batch is ready to go into the oven. I put mine right on my bricks--you can use a pizza stone but you can grease a cookie sheet and put them on the sheet on the bottom rack of the oven as well. 4) These pitas take 2-3min per side in my oven--yours may differ. Keep an eye on them and flip after the first 2-3 minutes. The pitas should puff up within a few minutes. If they don't, wait a minute or so longer. If they still don't puff, your oven may not be hot enough; raise the heat for the next batch if possible. Worst case scenario, whether it be the temperature or the design/function of your oven, your pitas will bubble a little and not puff uniformly. That's okay, don't panic. Wait for them to brown a little, and check for browning when you flip them. They will STILL taste great. 5) Remove the pitas from the oven and use a brush to paint them with melted butter, or alternatively olive oil. This will add a tiny bit more flavor and chewy texture to the breads. Wrap them in a towel (this keeps them soft). When the first batch (however many you could fit on your cookie sheet or stone--I did two at a time) comes out, get the next batch in the oven right away. 6) Repeat the baking steps until finished. Enjoy! NOTE: Due to lack of preservatives in the dough, the breads taste the best within the first few hours of baking. I would recommend freezing them if you plan to eat them more than one day after baking, as they will rapidly become stale. Alternatively you can store cooled pitas in an airtight container/bag for 1-2 days after baking. This particular yellow-crumbed loaf of bread was a semolina bread recipe that I decided to enhance with some other items I found in the kitchen. I put backyard herbs, cheddar, asiago cheese, and chorizo inside. You can use whatever you want, but nothing too wet! With the cheese and the semolina, the loaf is characteristically golden. Yield: 1 medium-large loaf
Ingredients: 1 cup semolina (not semolina flour) 2 cups all-purpose flour 2 Tsp instant yeast 1 to 1 1/4 cups lukewarm water 2 Tbsp olive oil 1 1/4 Tsp salt 1 cup diced hard cheese (pecorino, locatelli, piave, parmesan, stravecchio, etc) 1/2 cup diced sharper cheese (Provolone, cheddar, asiago, etc) Chorizo/meat cubes, to taste Directions: 1) Combine all ingredients--EXCEPT the three cheeses and salt--into a bowl, and mix on medium speed of an electric mixer to make smooth dough. Add the salt as soon as the dough begins to clump and form ropes. Switch to the dough hook and knead for about 5 minutes, or knead vigorously by hand on a floured surface. 2) Transfer dough to a floured surface and add the cheese cubes (and meat, if applicable) to the dough by kneading, until everything is incorporated. 3) Put the soft, cheese-filled dough in a lightly greased bowl, cover, and let rise for about 2 hours (it will become quite puffy). 4) Transfer the dough to a counter top that has been sprinkled with semolina (if you wish to bake them on a stone/brick in your oven). OR transfer the dough to a baking sheet that has been moderately sprinkled with semolina. The semolina will keep your dough from sticking to the pizza peel or baking sheet when baked, so don't be too skimpy. 5) Gently deflate the dough. You can divide the dough as you wish. For two loaves, divide the dough in half, and place both halves on the semolina-lined baking sheet or counter top. 6) Tent the dough with lightly greased plastic wrap and let rise for about an hour--it will puff some more. Preheat the oven to 425°F. 7) Take the plastic off the bread. Spray the dough with water, and use a sharp knife to make three diagonal slashes (1-2cm deep) in each loaf. Use a pizza peel to load your counter-top loaves into the oven. If you used the baking sheet, put those right into the oven. 8) Bake the bread for 30 minutes (keep your eye on the bread, every oven is different) until golden brown. When you tap on the bottom of the loaves, they should sound hollow. 9) Remove the bread from the oven, and carefully (don't get burnt!) transfer to a rack to cool. NOTE: Due to lack of preservatives in the dough, the breads taste the best within the first few hours of baking. I would recommend freezing them if you plan to eat them more than one day after baking, as they will rapidly become stale. This is one of the fluffiest, lightest breads I have posted on this blog. They grow quite a bit in size but are as light as clouds. This recipe shows backyard herbs tucked into the dough, but feel free to leave them out or add your own. The hint of potato flavor really gives the taste of the dough a nice finish. Yield: 12 potato puffs
Ingredients: 1 1/4 cups water 1/4 cup milk 2 teaspoons salt 2 teaspoons instant yeast 2 tablespoons olive oil 3/4 cup mashed potato flakes 4 1/4 cups King Arthur Unbleached All-Purpose Flour 3 Tsp fresh herbs (optional) Directions: 1) Pour the (warm) water into a medium-sized mixing bowl. Add the milk, salt, yeast and oil, and stir. Then add the potato flakes and the flour. Again, I do not use bread machines--I use my hands--but you can set the bread machine on the dough cycle or whatever you do to mix the dough. Or you can mix by hand with a wooden spoon. 2) When the ingredients are mixed together well enough so the dough comes away from the side of the bowl, turn it out onto a lightly floured surface and knead (by hand) for several minutes until silky smooth. You can add flour if the mix is too wet, but don't add too much or you will lose the flaky texture in the final product. 3) Lightly oil/grease a mixing bowl. Place dough in the mixing bowl, cover with plastic wrap, and let rise for 1-1.5 hours. Pat the dough down and turn it out onto a floured surface. If you want to make the puff shapes that I did, divide the dough in half, and then each half in three pieces. 4) Form a ball with each piece and place the balls in greased muffin tins, seam-side down. Let the dough rise in the tins 30-60 minutes (until they are noticeably puffy). 5) Preheat your oven to 350°F. Bake the puffs on the lower rack for about 35 minutes (keep your eye on them, every oven is different), or until golden brown. The puffs should sound hollow on the underside when tapped. Turn the loaf (or loaves) out and let them cool on a rack. NOTE: Due to lack of preservatives in the dough, the breads taste the best within the first few hours of baking. I would recommend freezing them if you plan to eat them more than one day after baking, as they will rapidly become stale. This bread dough is nice and hearty. It's very full, more dense than some others I have made. You can make whatever shapes you want, but I chose the S-shape for appearance. Yield: 8 S-shaped breads
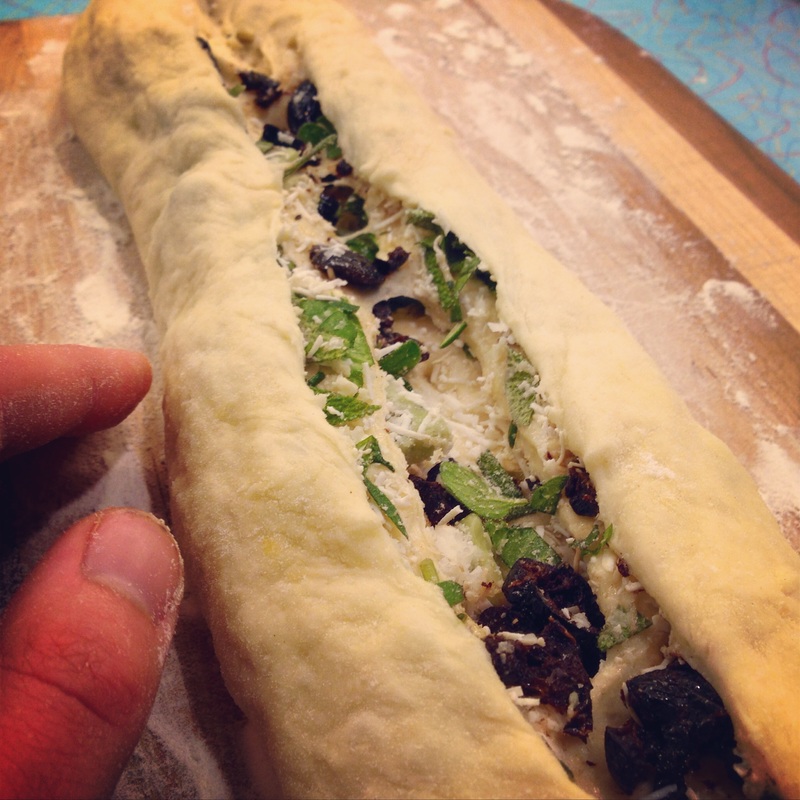
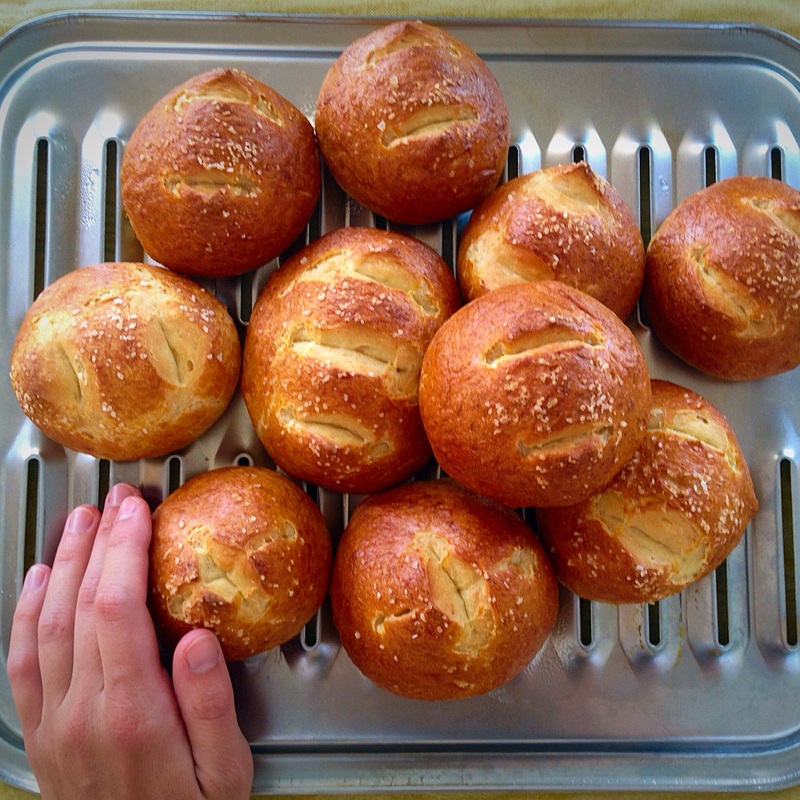
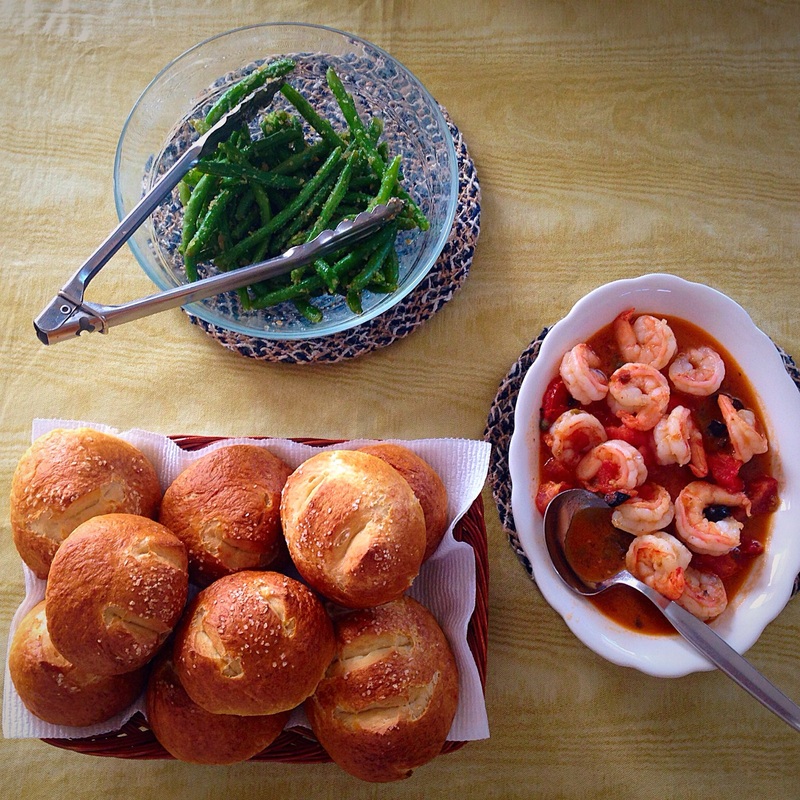
Ingredients: 6 cups all-purpose flour 1/2 cup warm water 1 cup milk 1/3 cup olive oil 2 large eggs 2 teaspoons salt 1/4 cup sugar 4 teaspoons instant yeast 1 (8 1/2-ounce) jar oil-packed sun-dried tomatoes 1 cup grated Italian cheese (pecorino, locatelli, parmesan, asiago, piave, stravecchio, etc.) 1 cup chopped fresh herbs (of your choice) Directions: 1) Combine the water, sugar, yeast, milk, olive oil, eggs, and flour, and mix, by hand or bread machine until the dough will become soft dough. Add the salt last, as the dough begins to clump and form ropes. Ultimately you should be able to form a smooth ball. 2) Place the dough in a greased bowl. Cover and let rise in a warm place until double, about 45-60 minutes. 3) Meanwhile, drain the sun-dried tomatoes of oil by placing them on top of paper towels. Finely chop the tomatoes. 4) Line two baking sheets with parchment. Gently deflate the dough and divide it into 8 pieces. Pat each piece into a rough rectangle. Sprinkle some cheese, herbs, and chopped sun dried tomatoes evenly on top of each rectangle, but not quite to the edges. 5) Starting with one long edge, roll the dough into a log. Pinch the edges to seal. 6) Place the log seam-side down on a baking sheet. Using a sharp knife, start 1/2" from one end and cut the log lengthwise down the center about 1" deep (to reveal the layers inside), to within 1/2" of the other end. 7) Keeping the cut side up, form an "S" shape. Tuck both ends of the "S" under the center of the "S" to form a "figure 8"; pinch the ends of the "S" together underneath, and seal them together. Cover buns and let rise in a warm place until doubled, about 60 minutes. 8) While the loaves are rising, preheat the oven to 350°F. 9) Bake the first loaf for 35 to 40 minutes. Again, every oven is different, so check your breads after 10 minutes to see how they are baking. Loaves should become golden-brown on top and should sound hollow on the underside when tapped. 10) Remove buns from their pans; cool on racks before serving. NOTE: Due to lack of preservatives in the dough, the breads taste the best within the first few hours of baking. I would recommend freezing them if you plan to eat them more than one day after baking, as they will rapidly become stale. This is a beautiful pretzel recipe. It's easy to put together, very flavorful, and very characteristically chewy because the buns are boiled before they are baked. They grow quite a bit on the bench and in the oven, and turn a beautiful gold-brown when baked. You can put any topping on it you want--sesame seeds, salt, etc. They go with just about anything! Yield: 12 golden pretzel puffs
Ingredients: For Dough: 1 cup warm water 3/4 cups milk 4-4 1/2 cups all-purpose flour 2 Tsp instant yeast 2 Tbsp unsalted butter, melted 3/4 Tsp kosher salt Coarse sea salt (for topping) For Boiling: 2 quarts water 1 Tbsp salt 1/4 cup baking soda Directions: 1) Mix and knead the dough ingredients in a medium/large bowl— by hand or mixer — to form a slightly sticky dough. Transfer dough to a lightly floured surface and knead 3-5 minutes until smooth and silky. 2) Place the dough in a lightly greased bowl and cover with plastic wrap. Let rest in warm place for about 1 hour, until doubled. 3) Gently deflate the dough, and transfer it to a lightly floured surface. Divide the dough into 12 pieces and shape each piece into a smooth ball. 4) Place the balls on a lightly greased baking sheet, cover, and let rest for 15 minutes (they will puff a little). Preheat the oven to 400°F. 5) Prepare the water bath: Add the water, salt, and baking soda to a large pot and bring to a boil. 6) Drop 2-3 dough balls at a time into the boiling water bath. 7) Let the balls simmer for 30 seconds on each side. Then, using a slotted spoon, return the buns to the greased baking sheet. 8) Using scissors, cut crosses into the center of each bun (2-3cm deep). Sprinkle the wet buns with coarse sea salt. 9) Bake the buns for 20 to 25 minutes, or until they're a dark, golden brown. Remove them from the oven, and transfer to a rack to cool. NOTE: Due to lack of preservatives in the dough, the breads taste the best within the first few hours of baking. I would recommend freezing them if you plan to eat them more than one day after baking, as they will rapidly become stale. After many requests that I received on my Instagram account (@breadventures_nj) to start a blog or send recipes, I've decided to take my bread enthusiasm and photos to the web. This is my very first blog post! I'm in the middle of establishing a basic website for bread amateurs (like myself), experts, foodies, and food science enthusiasts to interact in a shared space. My goal is to keep this site communal, clean, and practical. I prefer the emphasis to be on pictures, recipes, articles, or links from the community that are pertinent to our collective interest: exploring and appreciating the art of making bread.
|
AuthorFemale. Categories
All
Archives
January 2015
|


 RSS Feed
