@Breadventures_NJ
  • Home
  • Blog
  • Recipe Index
  • Forum
  • Contact

SWEET DESSERT PRETZELS

9/28/2014

0 Comments

 
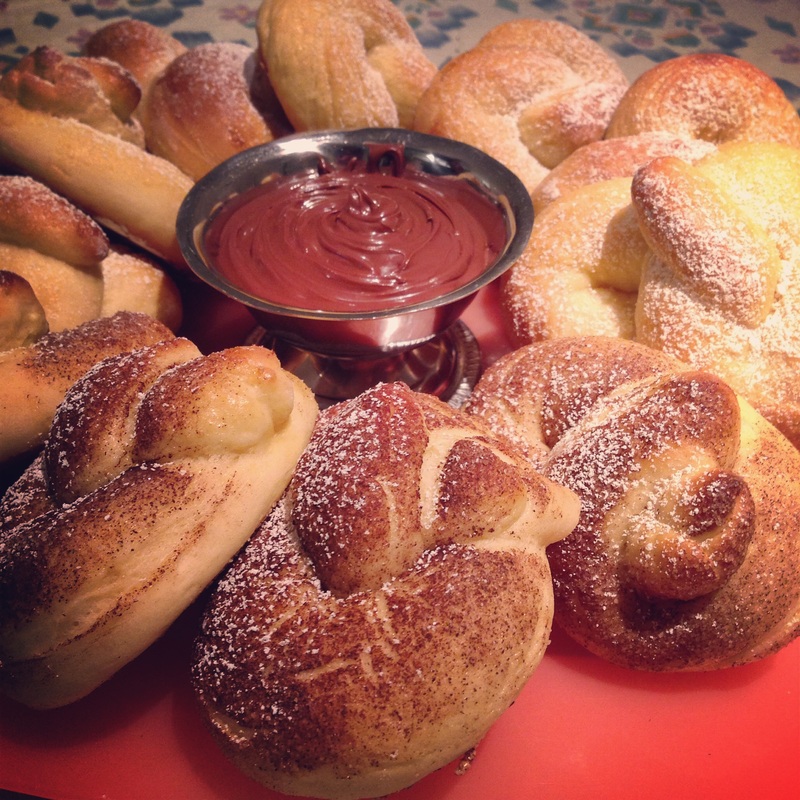
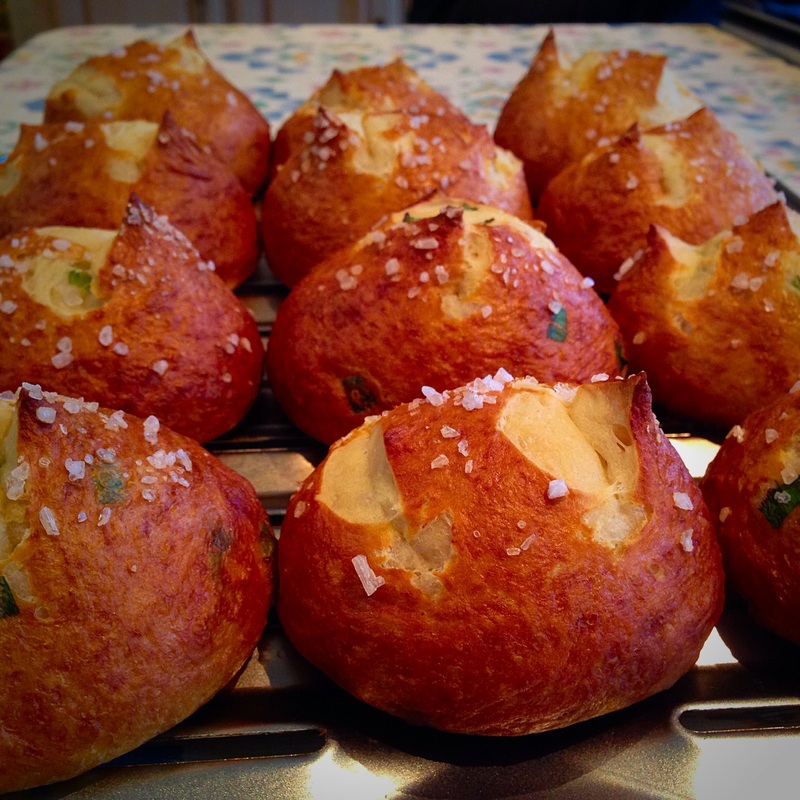
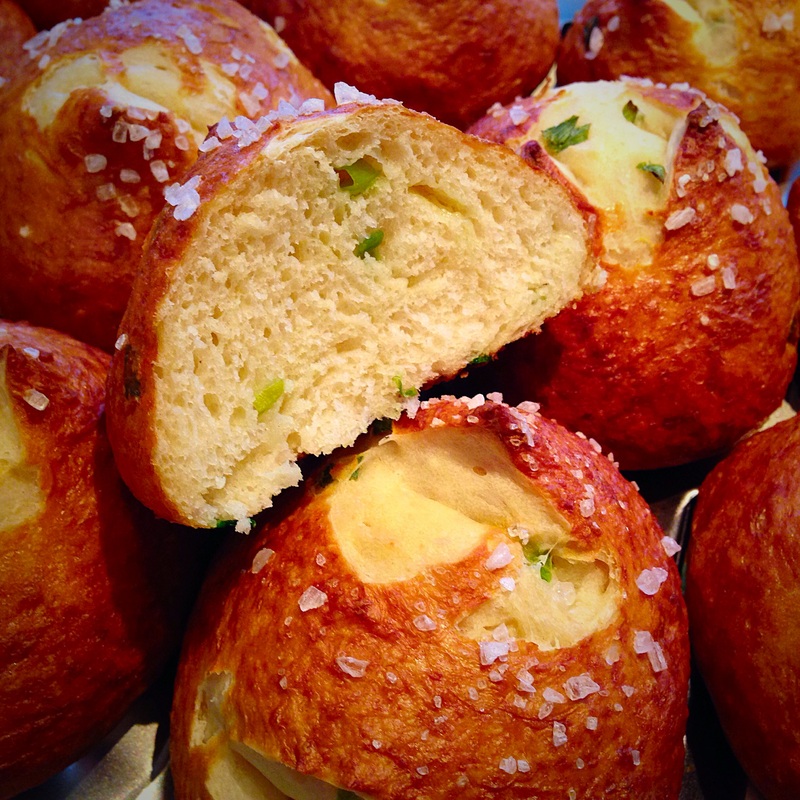
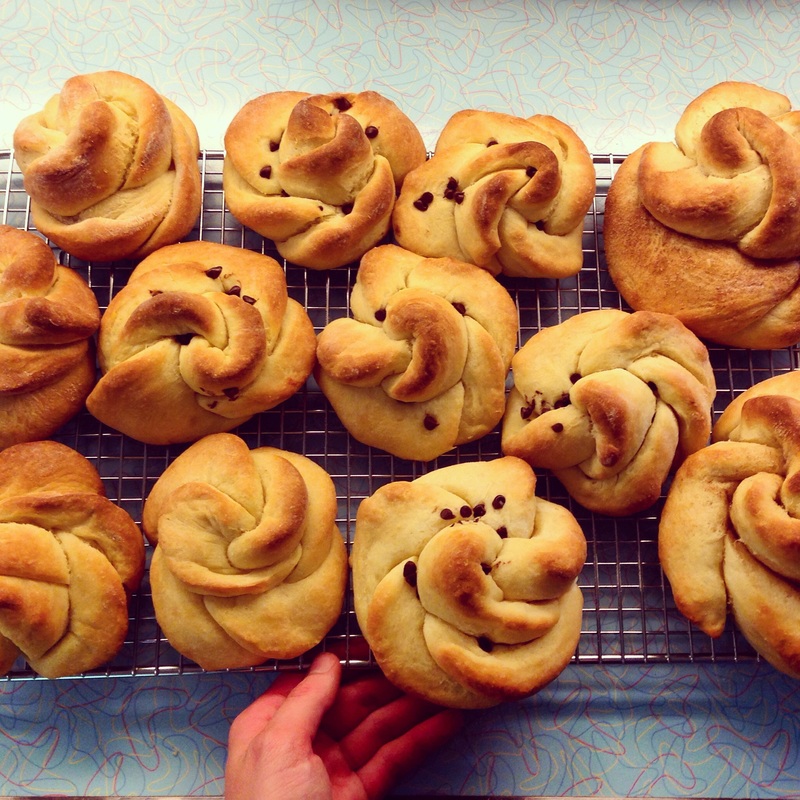
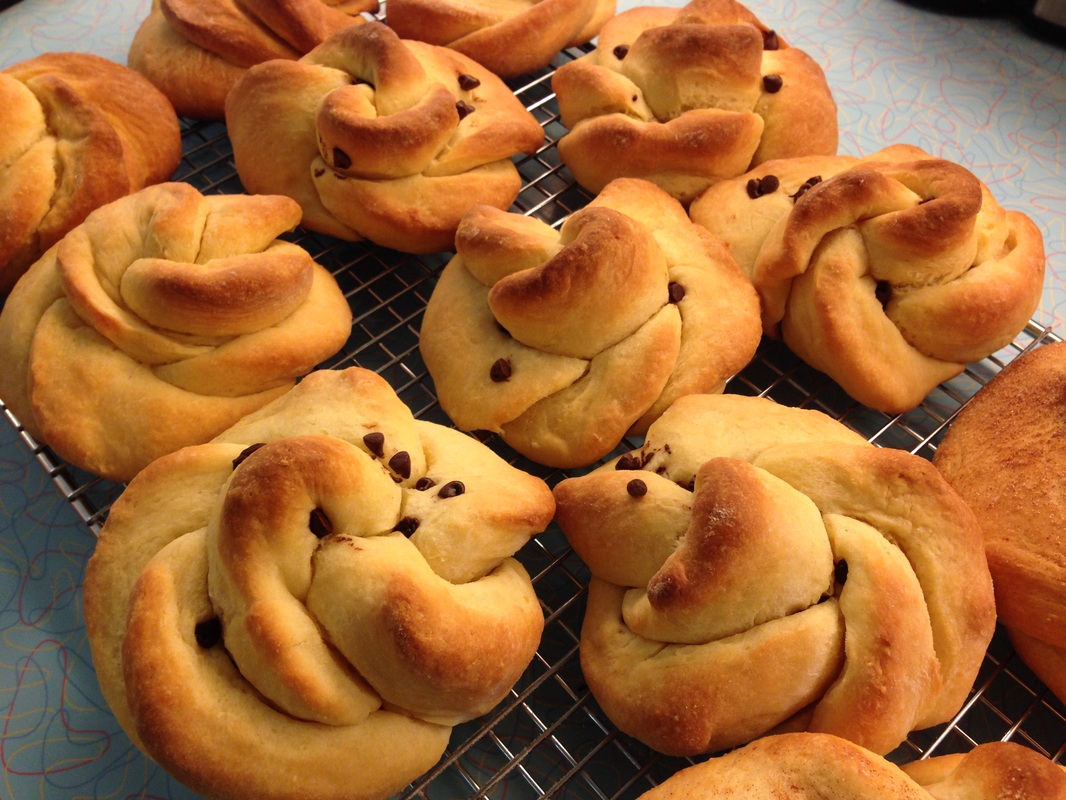
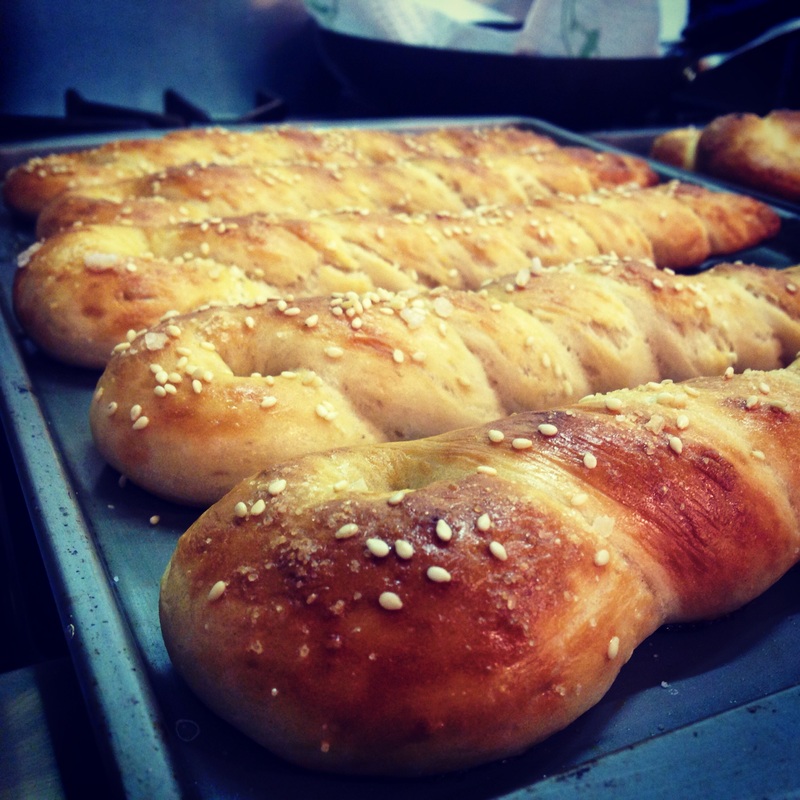
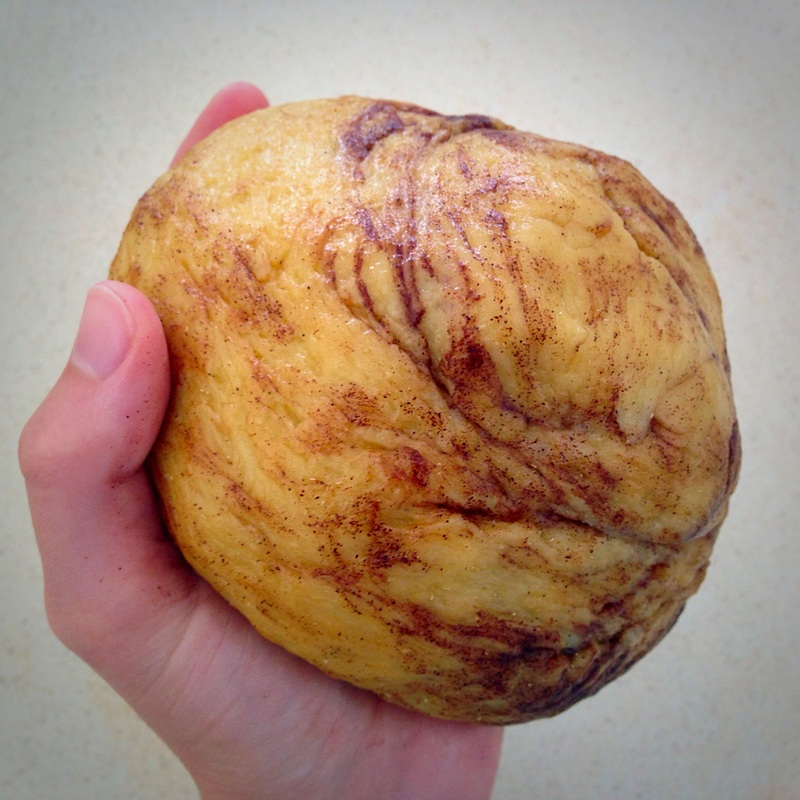
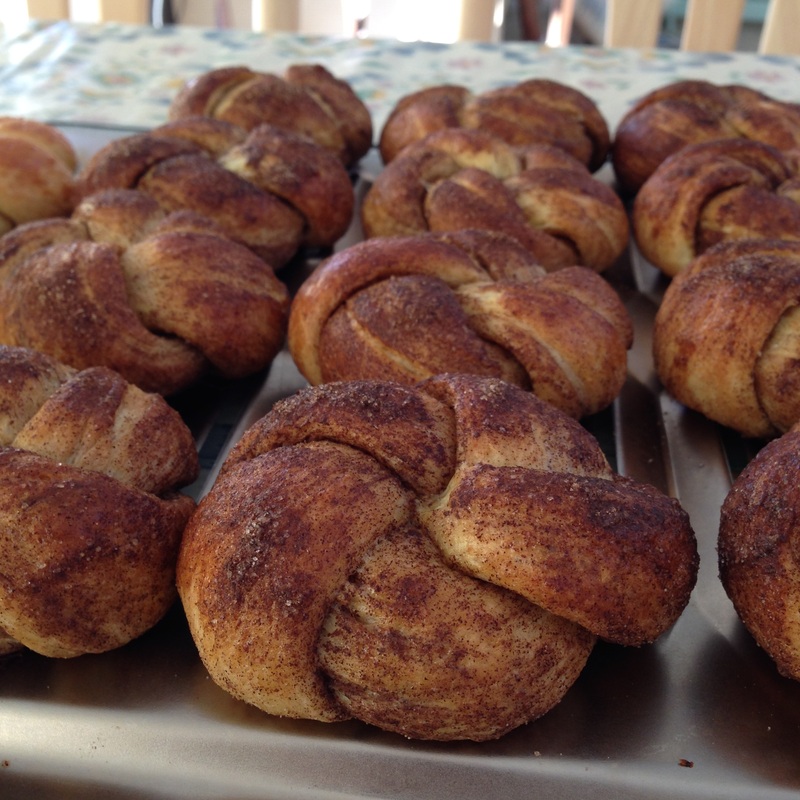
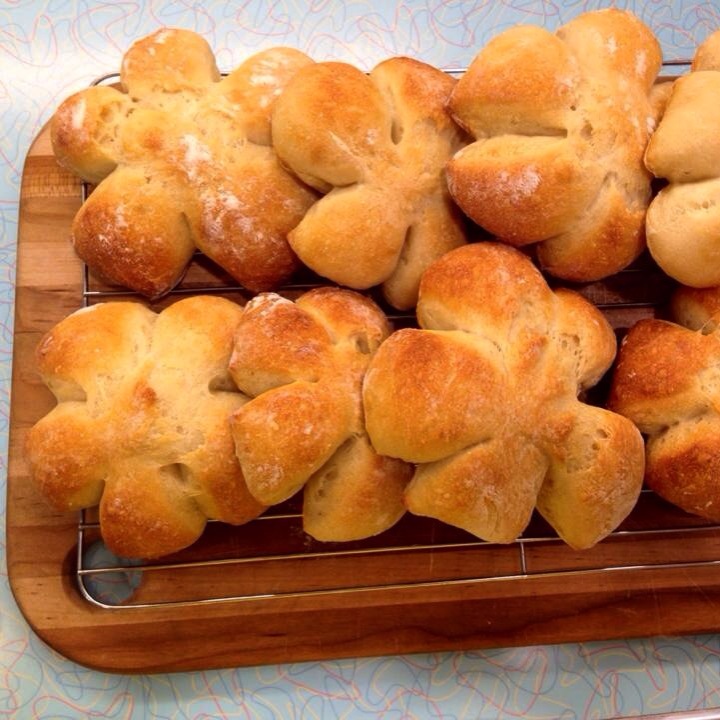
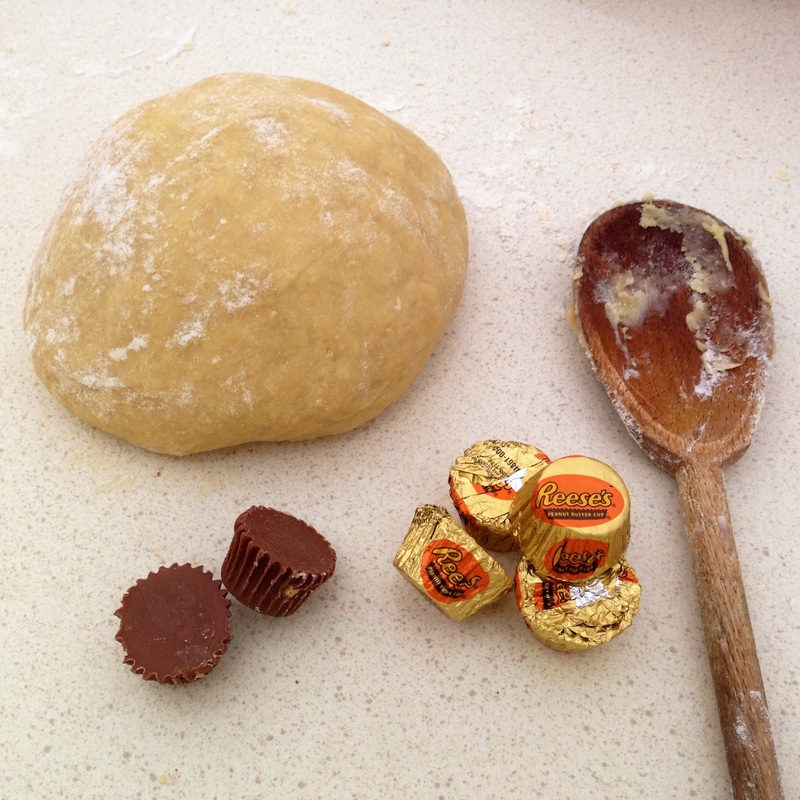
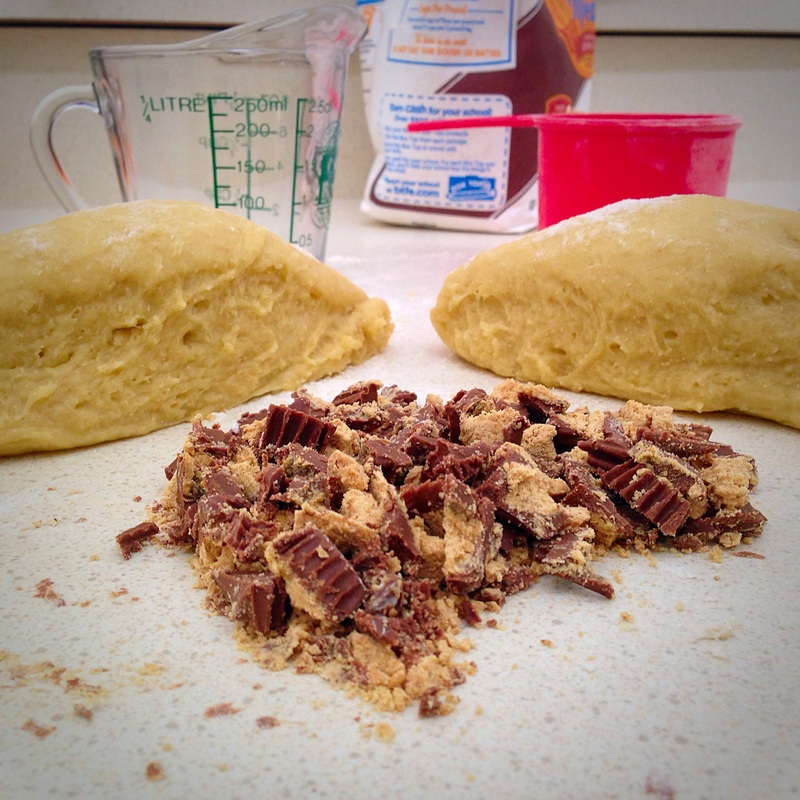
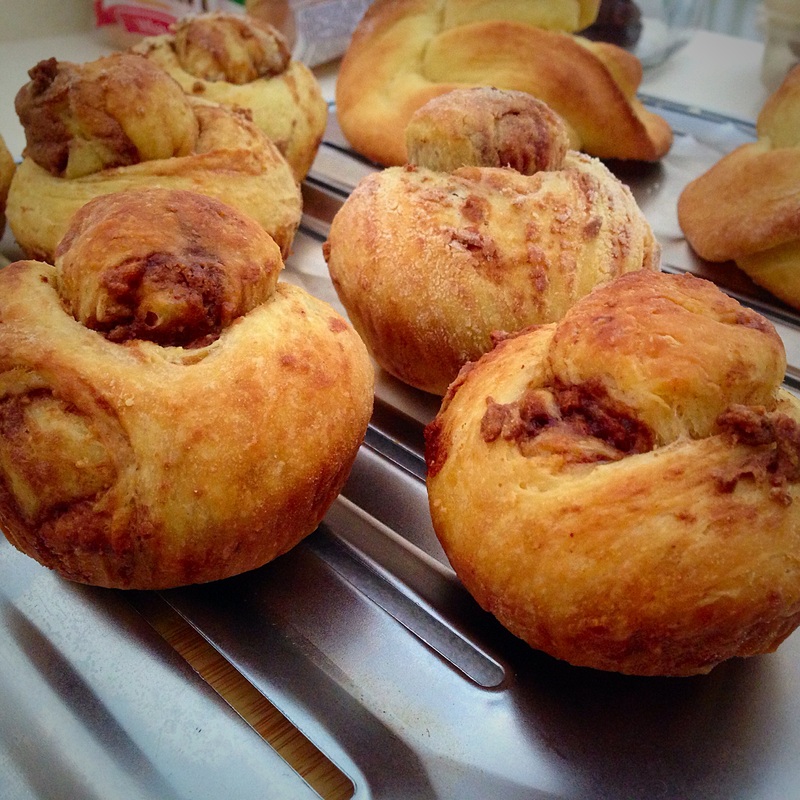
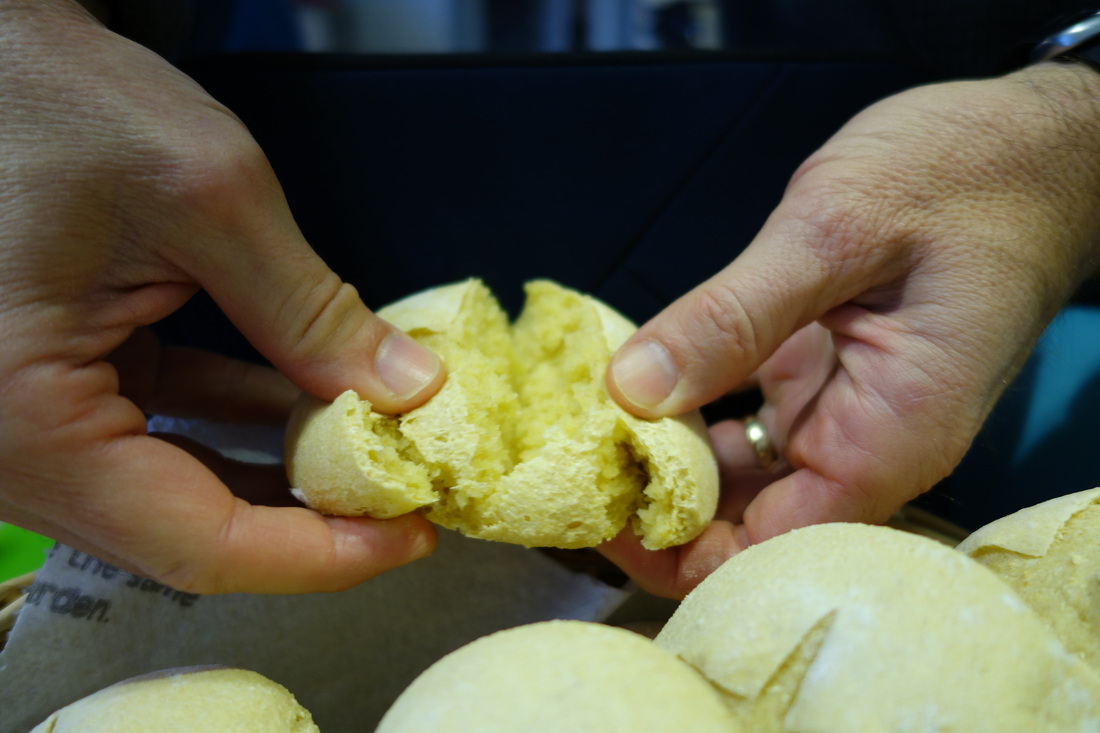
      This recipe is very interesting--definitely a dessert or breakfast item. The dough has more of a buttery/brioche quality, and goes better with chocolate dip, nutella, or dessert items rather than ketchup or mustard. It is a yeasted dough, so they are fluffy breads--not cookies. You can add coarse sugar or cinnamon sugar--whatever you want to the top. They tasted great dipped in Nutella.
Yield: 12 small dessert pretzels

Ingredients:
For dough:
3-3 1/2 cups all-purpose flour
1 Tsp kosher salt
1 3/4 Tsp instant yeast
2 eggs
1/2 cup unsalted butter (1 stick), softened and cut into small chunks
5 Tbsp sugar
2/3 cup whole milk


For brushing:
1 egg white
All-purpose flour for dusting
5 Tbsp coarse sugar
(or cinnamon sugar, if you prefer)

Directions:

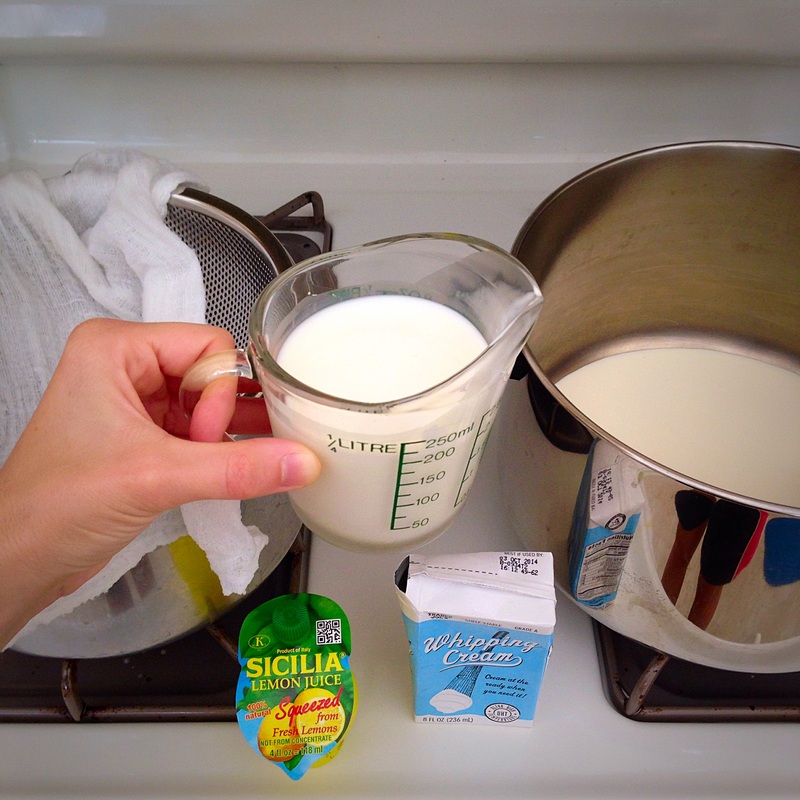
1) Heat milk over medium heat to 110°F. Transfer to a small bowl and stir in 1 Tbsp sugar. Add yeast to the warm milk and blend. Let sit 5 minutes. Add eggs; whisk until smooth.

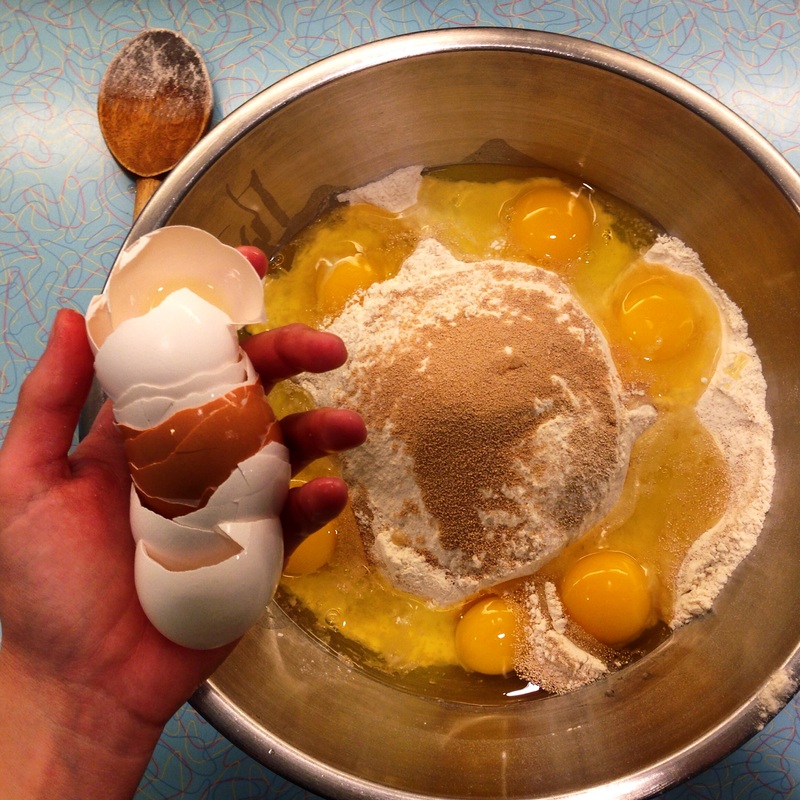
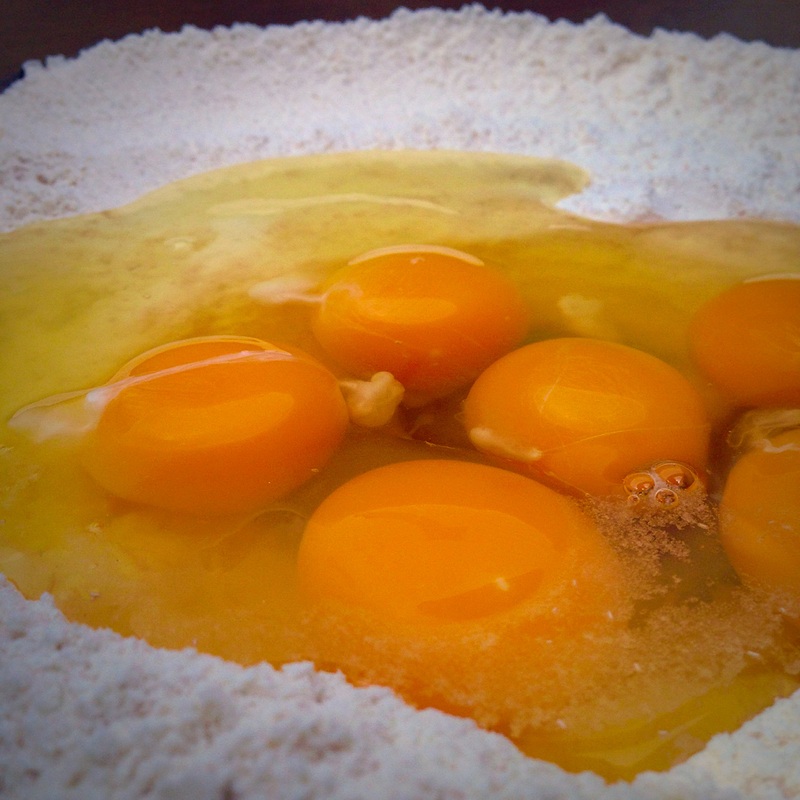
2) In a separate medium-large bowl, add together the remaining 4 Tbsps sugar, flour, and salt. Then add the milk/egg mixture. Then add the softened pieces of butter, 1 piece at a time, stirring well.

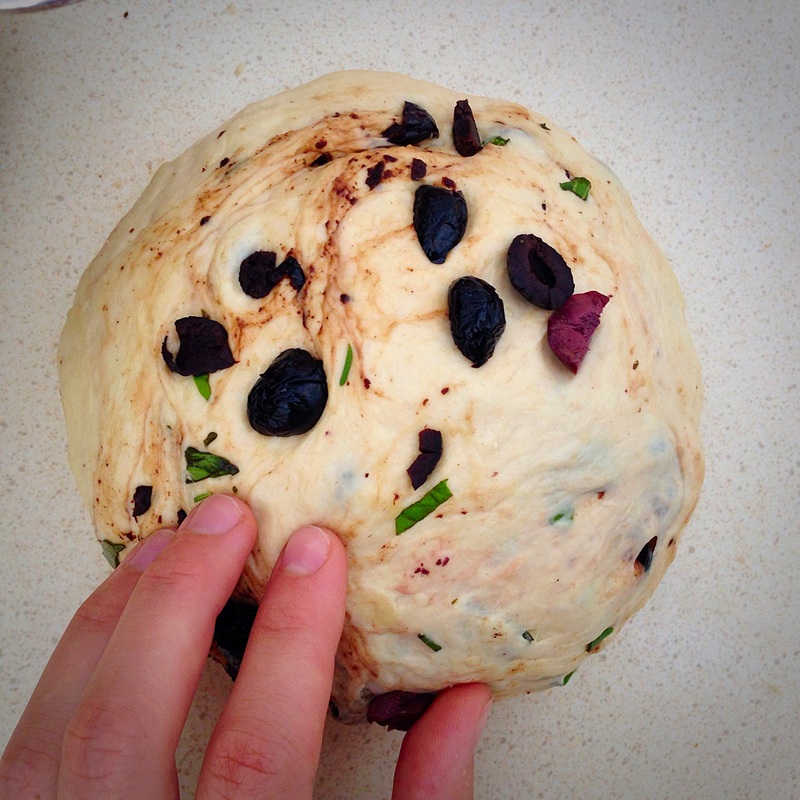
3) Transfer dough to lightly floured surface
and knead until dough is silky, about 5 minutes. You may have to add additional flour if your dough is too wet.

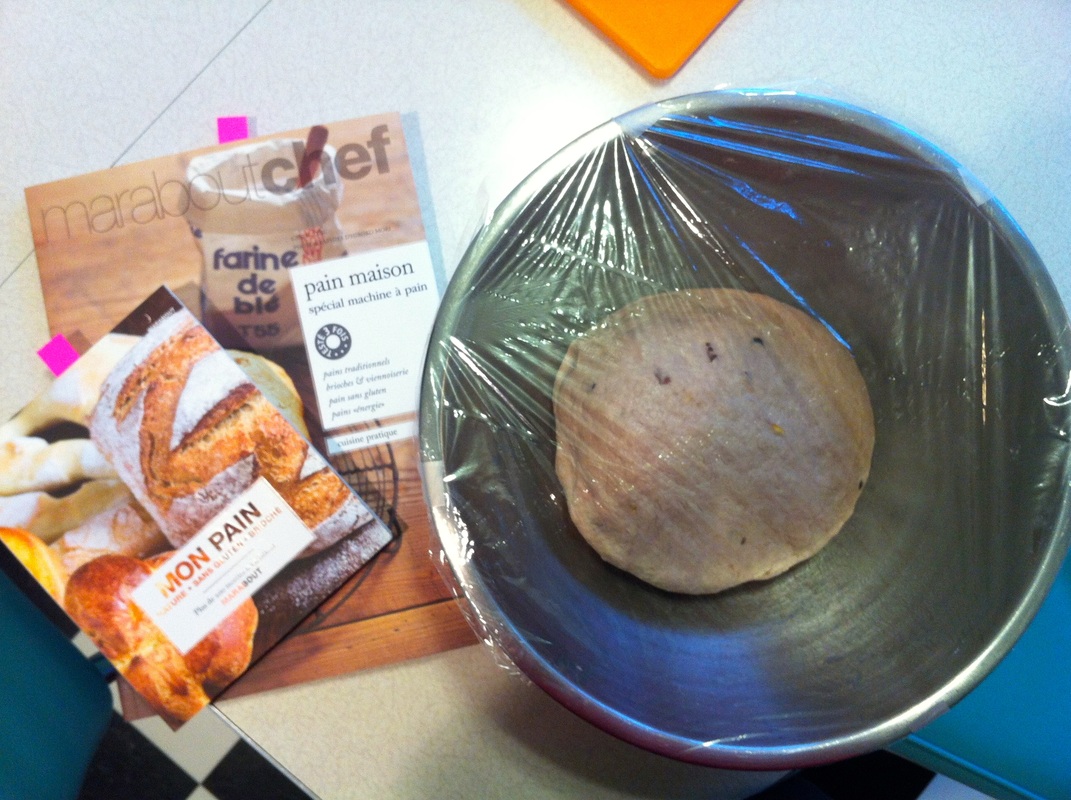
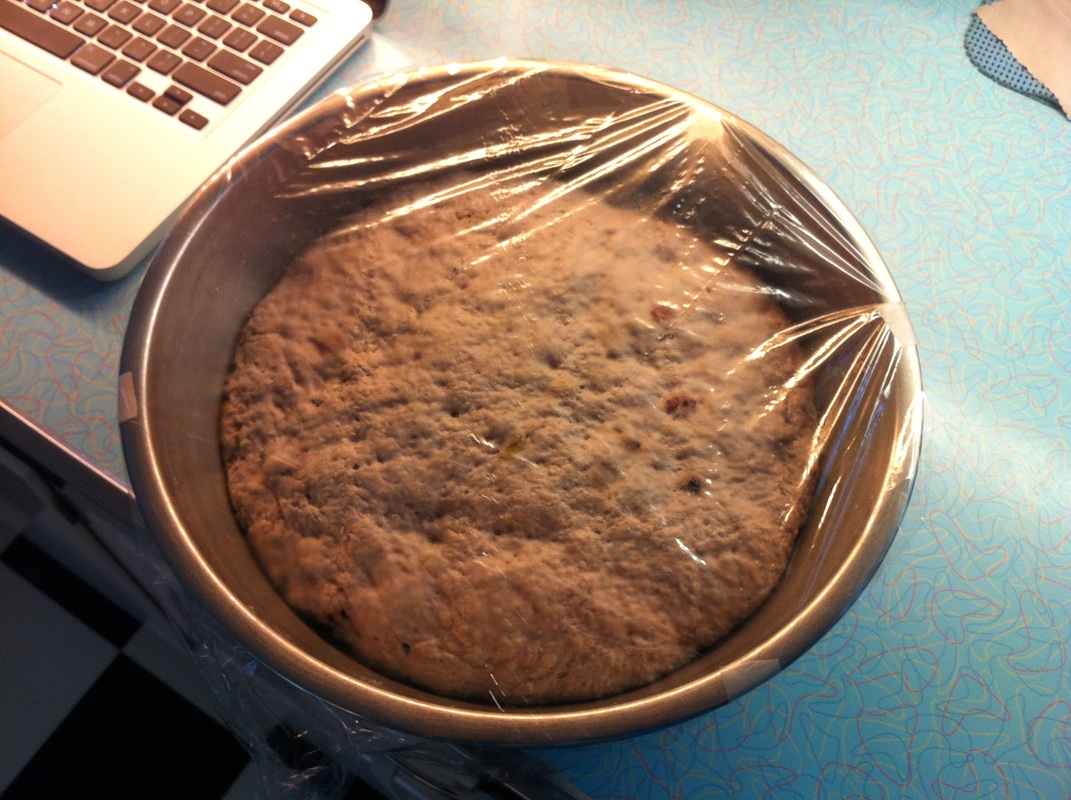
4) Place dough in lightly greased bowl and cover with plastic wrap.  Let dough rise in a warm area until doubled in size, about 1.5-2 hours. Line 2 medium baking sheets with parchment paper.

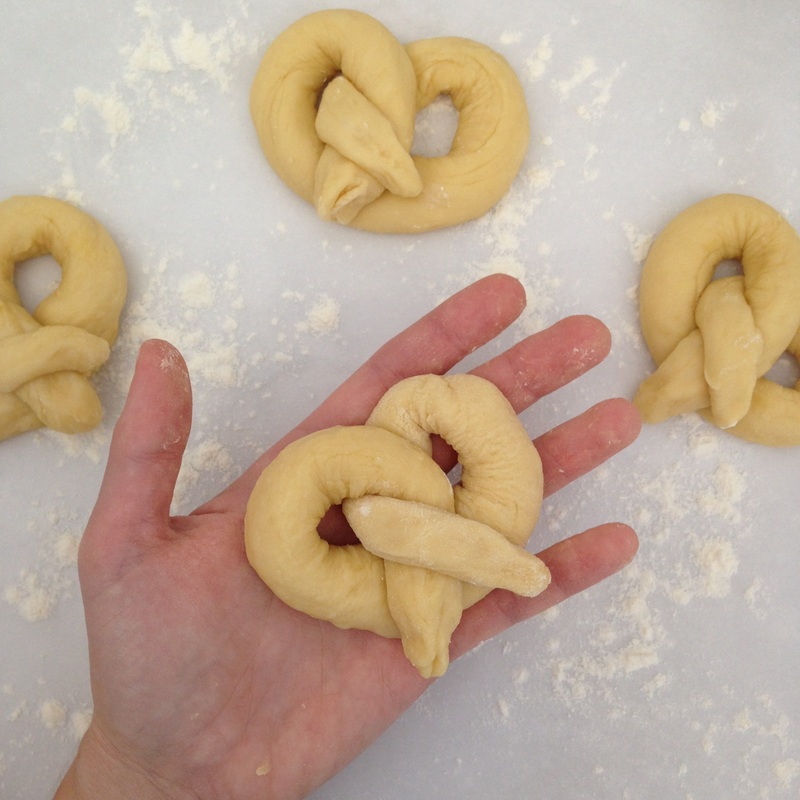
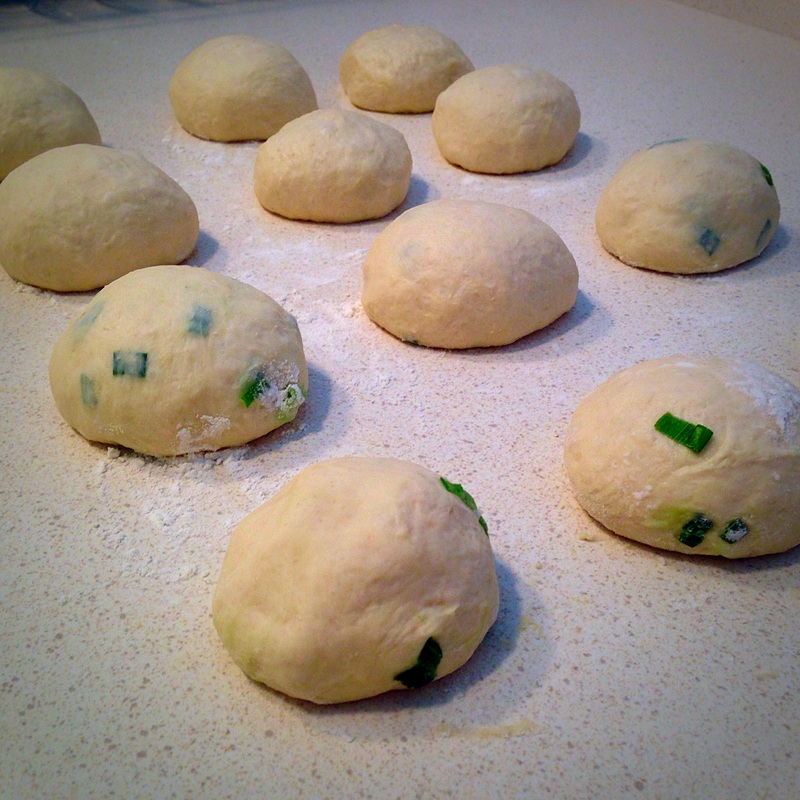
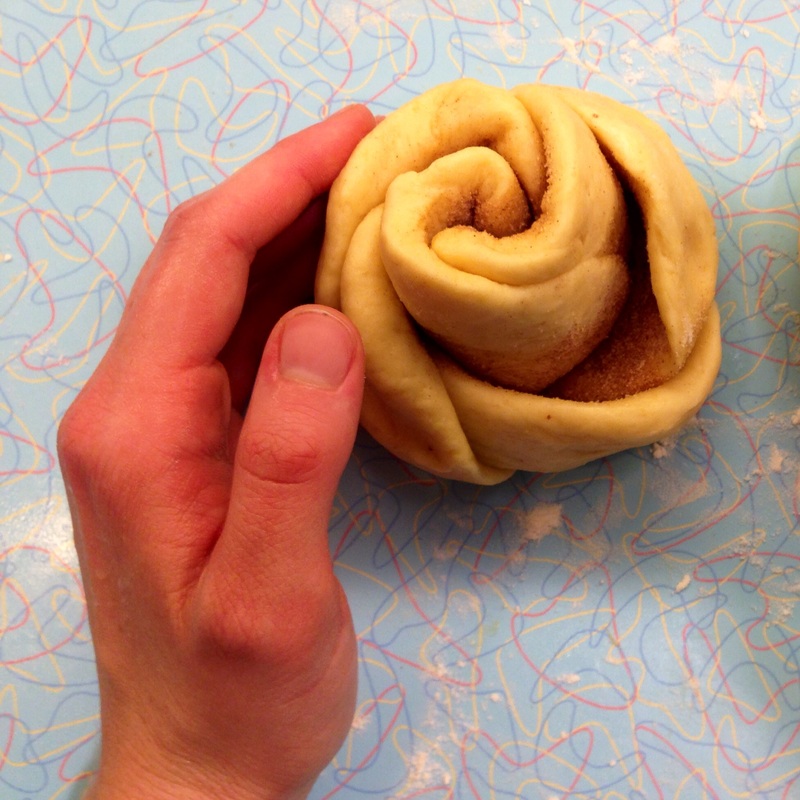
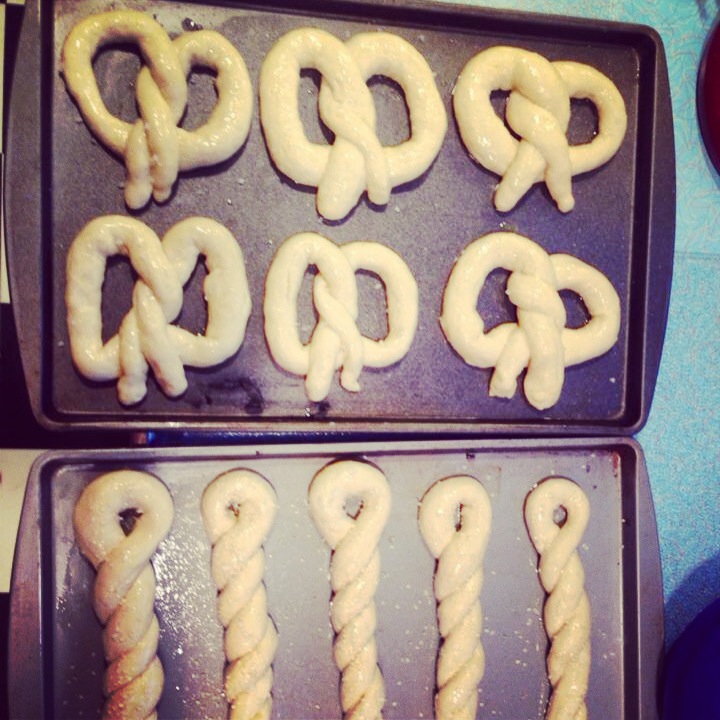
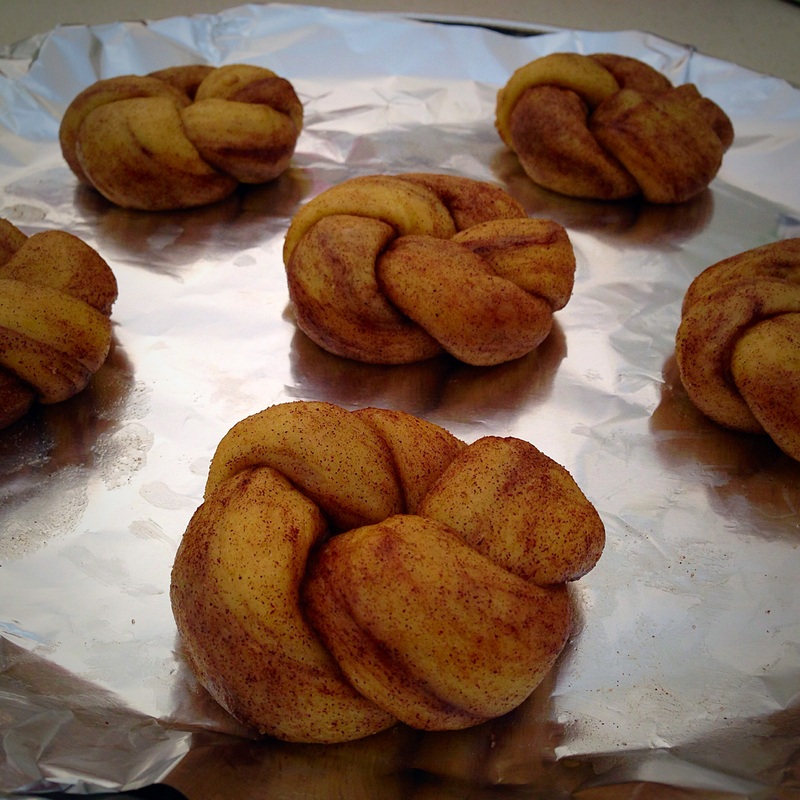
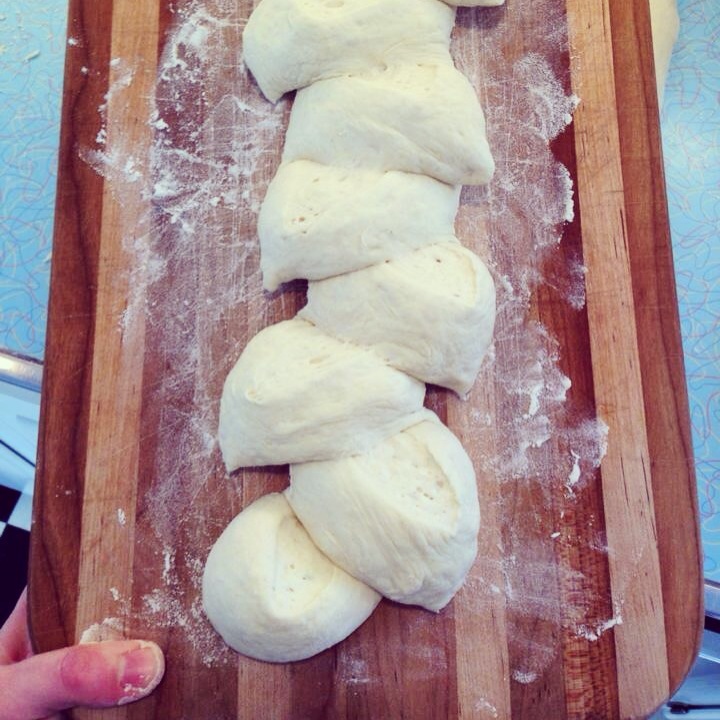
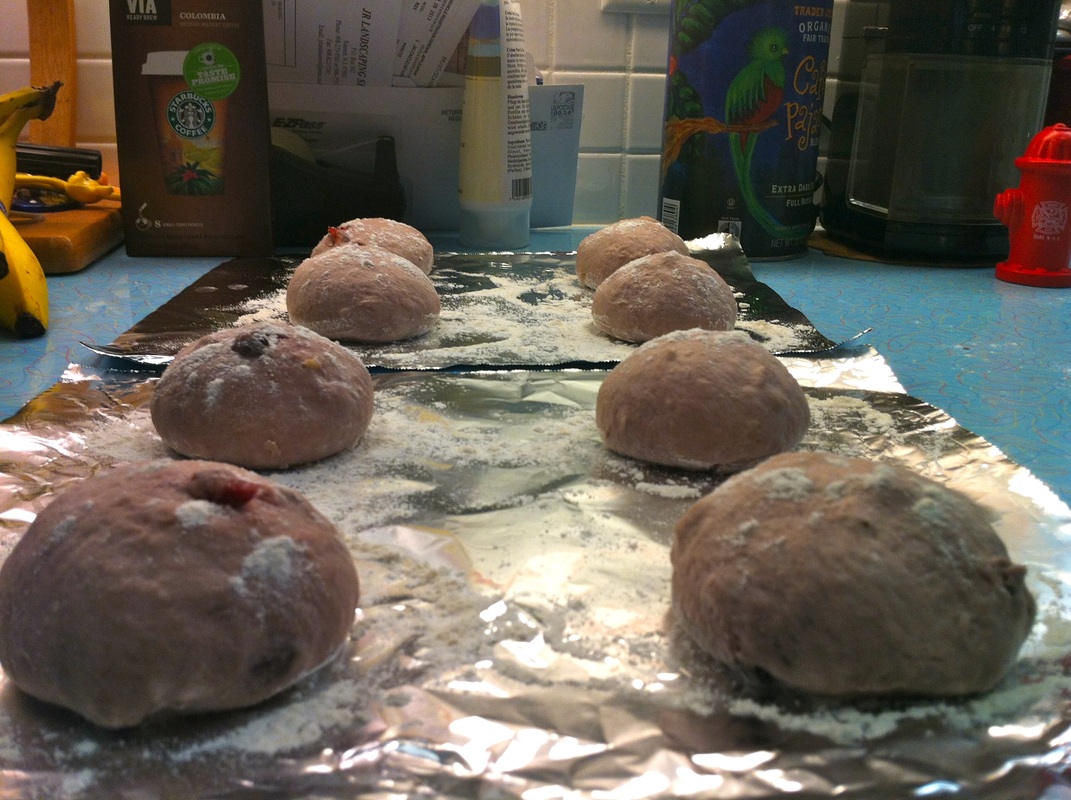
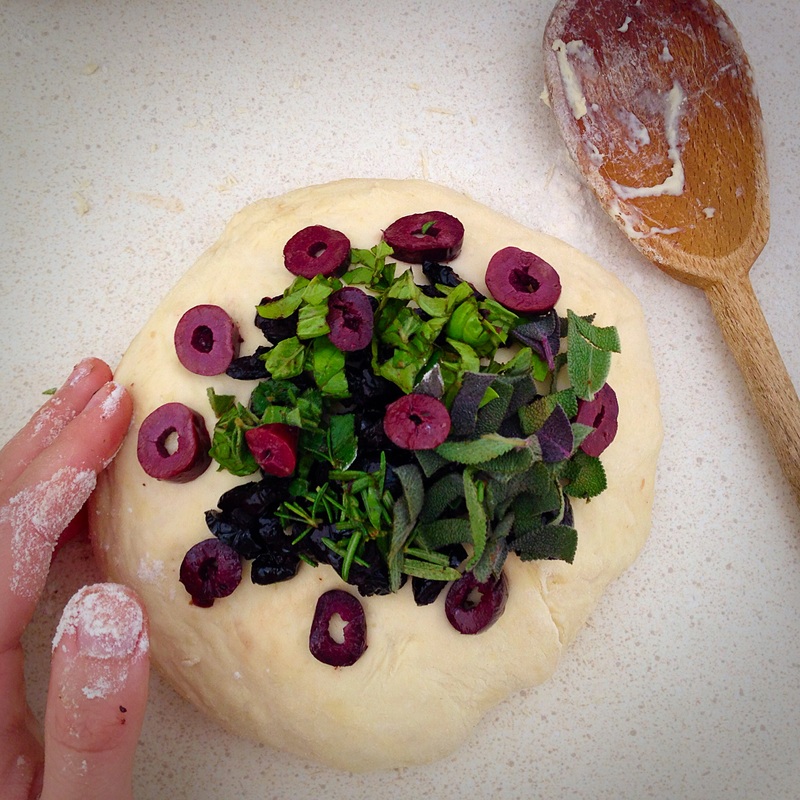
5)
Punch down dough; divide into 12 equal pieces. Roll each piece dough on a lightly floured surface into rope (about 12-14" long). Form rope into a U-shape. Take the ends of the "U" and cross them over each other. Then grab the where they overlap and bring it down over what was the base of the "U"--now you have formed your basic pretzel shape! Repeat for all remaining pieces of dough.

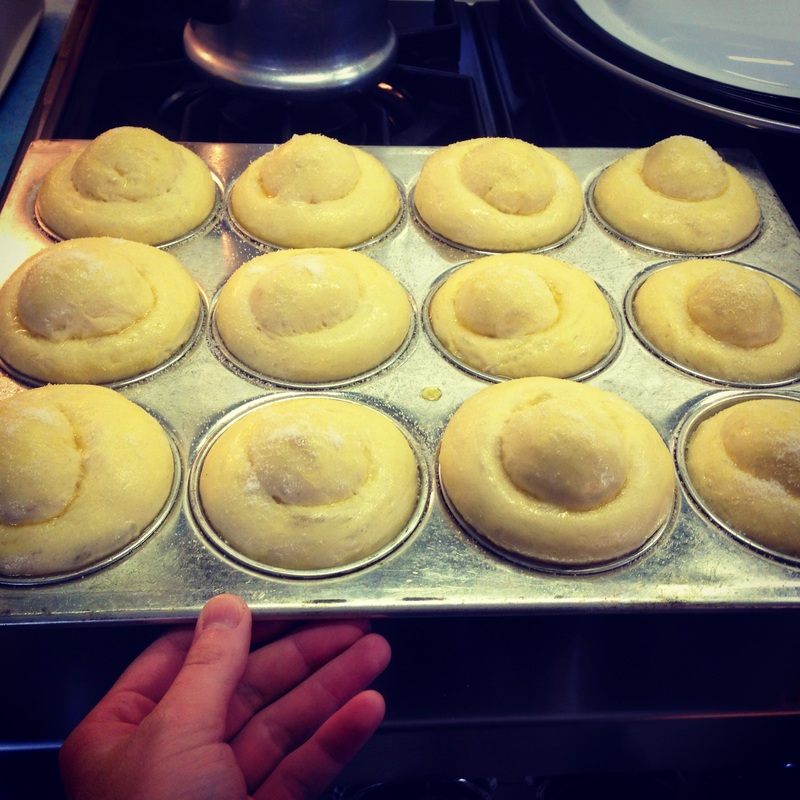
6)
On each parchment-lined baking sheet, place 6 pretzels--spacing them at least 2" apart. Loosely cover pretzels with plastic wrap or a kitchen towel. Let dough rise in a warm, area until slightly puffy, about 30 minutes.

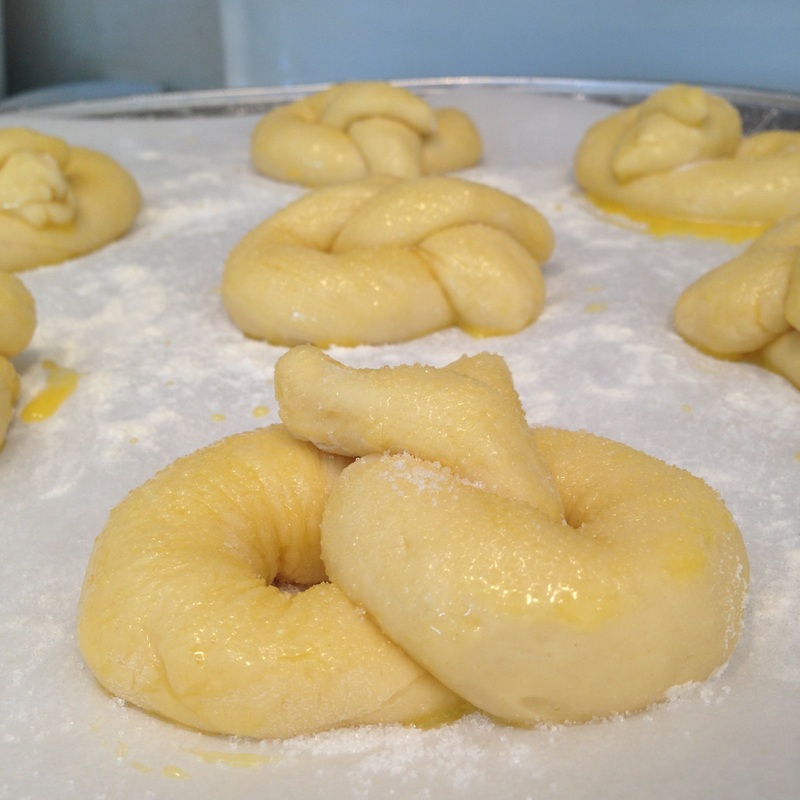
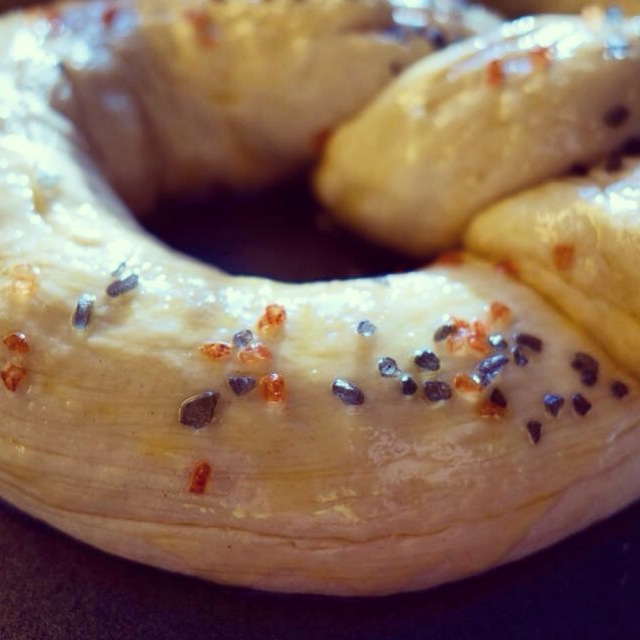
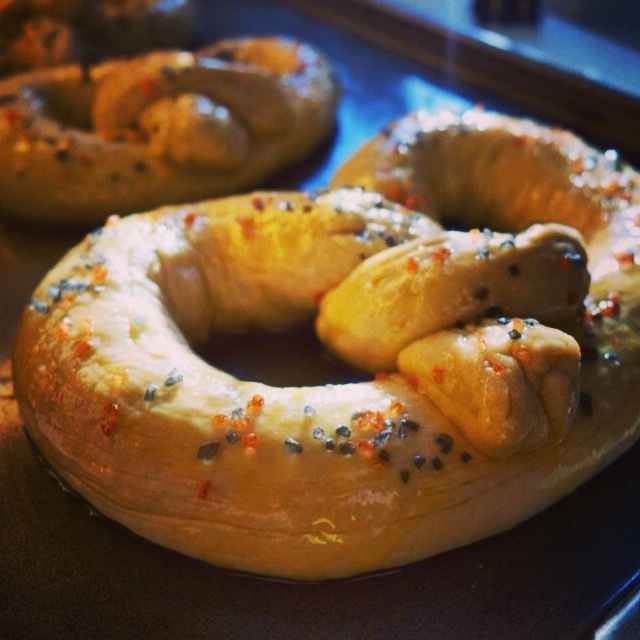
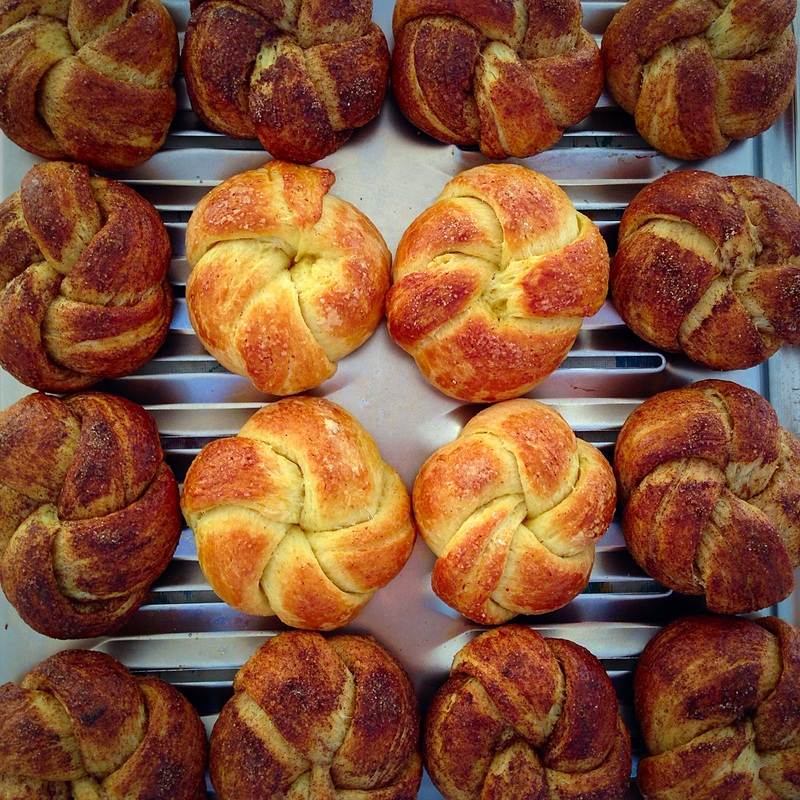
7) Preheat to 375°F. Add 2 Tsp of warm water to the egg white and whip together in a small bowl. Brush each pretzel all over with the egg-water wash. Then sprinkle each with 1/2 Tbsp coarse sugar (or cinnamon sugar).

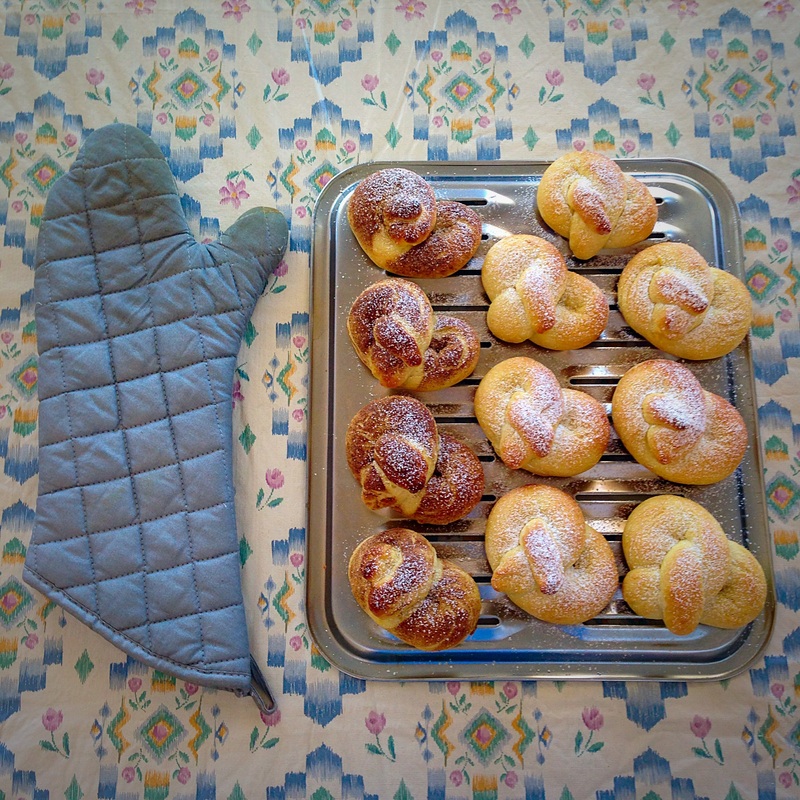
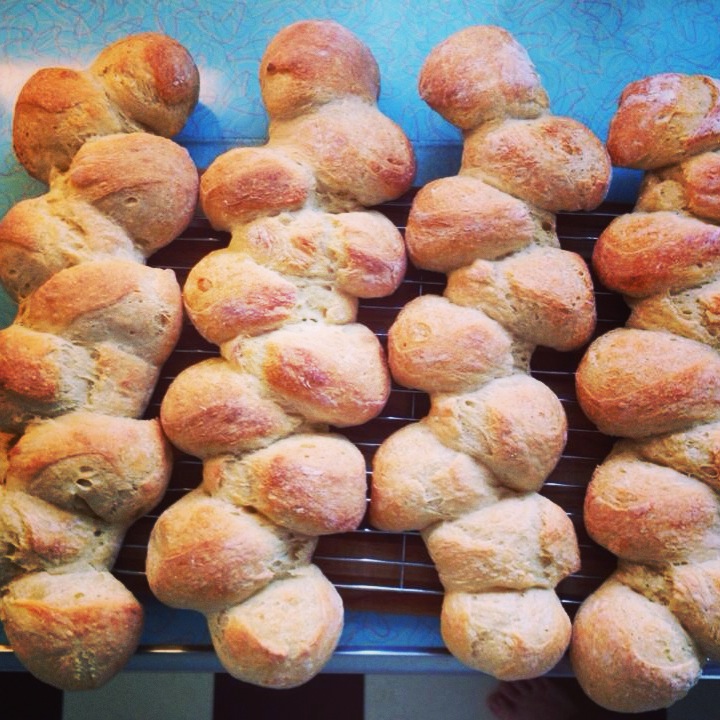
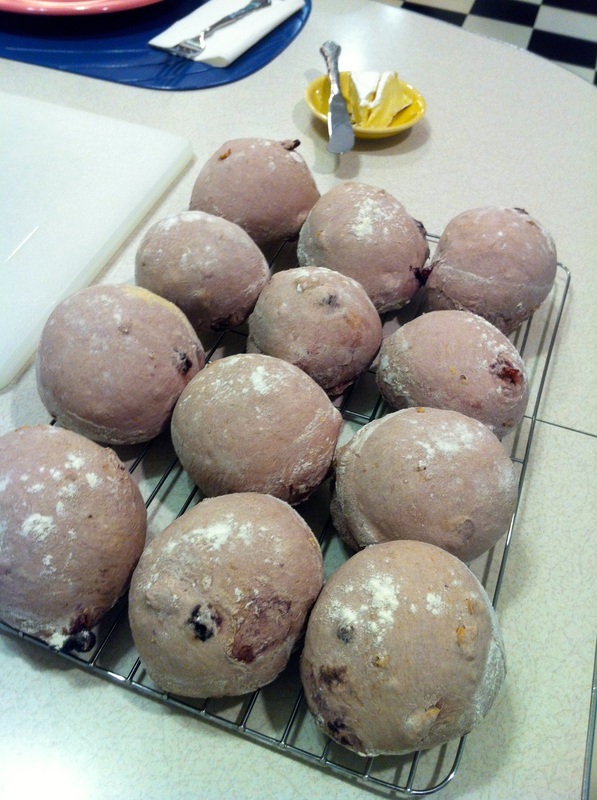
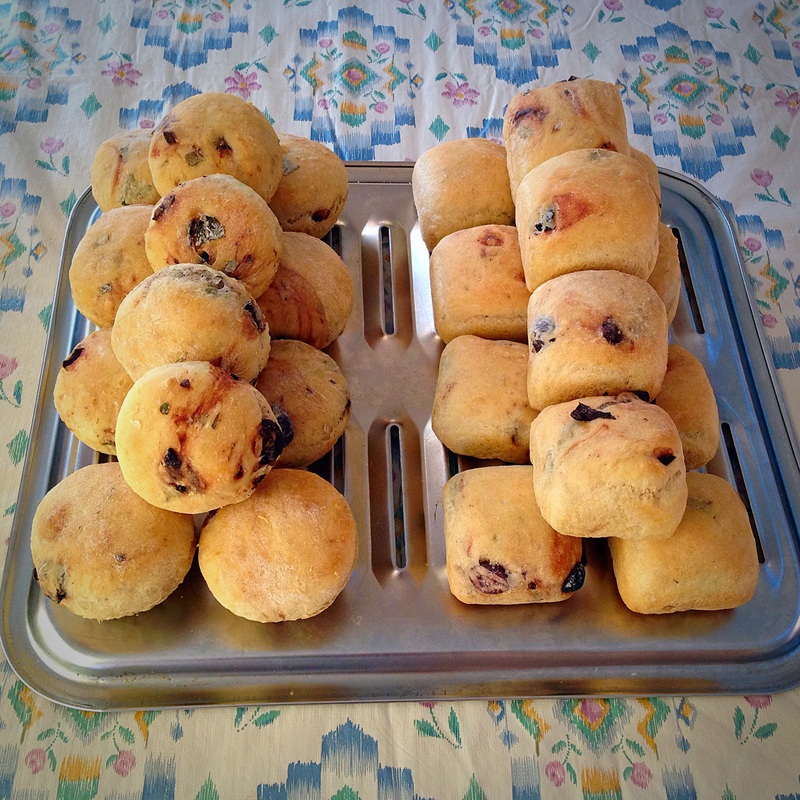
8) Bake for 15 minutes, rotating baking sheets after 7 minutes. Continue baking until pretzels are golden. Transfer to rack for cooling. Serve warm or within several hours of baking.

NOTE: Due to lack of preservatives in the dough, the breads taste the best within the first few hours of baking. I would recommend freezing them if you plan to eat them more than one day after baking, as they will rapidly become stale.
0 Comments

QUICK HOMEMADE RICOTTA CHEESE

9/14/2014

0 Comments

 
     This recipe is extremely simple, using only four ingredients, two pots, a sieve, and a cheesecloth. It takes less than 30 minutes to make, and the result is fantastic. Traditionally, ricotta (Italian: re-cooked) is made from re-cooking the whey drippings after making another cheese (i.e mozzarella). In this recipe, and many other quick home recipes, you can produce a comparably delicious "ricotta" cheese using proteins from heavy cream and milk instead of from whey drippings.
Yield: ~ 2 cups spreadable Ricotta cheese

Ingredients:
1 cup heavy cream
1/2 Tsp salt
8 cups
whole milk
3 Tbsp lemon juice
1 medium-large sieve + 1 cheese cloth

Directions:
1) Place the heavy cream, whole milk, and salt into a large pot over medium heat.

2) Stir occasionally to prevent burning, keep mixture over medium heat until it starts to bubble and froth (when this happens it will be very obvious. Be patient). Set aside a sieve over a medium-large pot with the cheese cloth over the sieve.

3) When frothing occurs, add lemon juice and reduce to low heat. Stir gently as curds begin to form. Wait at least 2 minutes. If you want smaller curds, you can wait an additional 1-2 minutes.

4) Pour ricotta curd mixture into the other pot with the sieve and cheese cloth. Let drain 10-15min or until desired constancy (the longer you go, the dryer it is). Transfer to a bowl.

5) Cover and chill ricotta in bowl until serving, or keep refrigerated in a tightly sealed container (will last 5-7 days).

NOTE: you can save the whey drippings from making this cheese and use it to fortify soups and smoothies with protein!
0 Comments

SCALLION PRETZEL PUFFS

9/13/2014

0 Comments

 
     This recipe represents a different take on the more traditional pretzel puff recipe I have shared in another blog post. I wanted to add a nice flavor to the pretzel dough that was not overpowering, and I think scallions can do just that. I have tried many pretzel recipes--this is one that requires boiling the raw dough balls before you salt and bake them. I like this method because it gives the pretzels their golden, chewy character. It was a big success, and I would definitely recommend giving it a try.
Yield: 12 pretzel puffs

Ingredients:
For Dough:
1 cup warm water
3/4 cups milk
4-4 1/2 cups all-purpose flour
2 Tsp instant yeast
2 Tbsp fresh scallions, chopped (or the amount you would like)
2 Tbsp unsalted butter, melted
3/4 Tsp kosher salt
Coarse sea salt (for topping)

For Boiling
:
2 quarts water
1 Tbsp salt
1/4 cup baking soda


Directions:
1) Mix and knead the dough ingredients EXCEPT the scallions in a medium/large bowl— by hand or mixer — to form a slightly sticky dough. Transfer dough to a lightly floured surface and knead 3-5 minutes until smooth and silky. THEN add the scallions to the dough and knead them in until incorporated

2) Place the dough in a lightly greased bowl and cover with plastic wrap. Let rest in warm place for about 1 hour, until doubled.

3) Gently deflate the dough, and transfer it to a lightly floured surface. Divide the dough into 12 pieces and shape each piece into a smooth ball.

4) Place the balls on a lightly greased baking sheet, cover, and let rest for 15 minutes (they will puff a little). Preheat the oven to 400°F.

5) Prepare the water bath: Add the water, salt, and baking soda to a large pot and bring to a boil.

6) Drop 2-3 dough balls at a time into the boiling water bath.

7) Let the balls simmer for 30 seconds on each side. Then, using a slotted spoon or sieve, return the buns to the greased baking sheet.

8) Using scissors, cut crosses into the center of each bun (2-3cm deep). Sprinkle the wet buns with coarse sea salt.

9) Bake the buns for 20 to 25 minutes, or until they're a dark, golden brown. Remove them from the oven, and transfer to a rack to cool.

NOTE: Due to lack of preservatives in the dough, the breads taste the best within the first few hours of baking. I would recommend freezing them if you plan to eat them more than one day after baking, as they will rapidly become stale.
0 Comments

CHOCOLATE CHIP FLOWER BREAD

9/12/2014

0 Comments

 
     This recipe is essentially a buttery, dessert, brioche-like dough that I shaped into flower/swirls with chocolate chips incorporated for additional flavor. Due to the high butter content, the dough itself it great for rolling and shaping, especially after it is chilled in the refrigerator--and it doesn't make much of a mess. I have found it to produce reliable results--the shapes still look great after baking, and the flavor is magnificent. You can make any shape you want. It took me a few tries to get a decent flower/swirl shape.
Yield: 6 medium flower breads (or 12 smaller) breads

Ingredients:
3 - 3 1/2 cups all-purpose flour
3 Tbsp sugar
1 1/4 Tsp salt
1 tbsp instant yeast
3 large eggs*
1/4 cup milk
10 Tbsp butter
Mini chocolate chips for sprinkling
*You can save the white of a 4th egg to brush on the buns if you plan to top them with sugar

Directions:
1) In a mixer or bread machine (programmed for dough), mix together 3 cups of flour and the rest of the ingredients to form a smooth dough. It will be sticky at first and may require the extra 1/2 cup flour to make the dough come together if the conditions in your kitchen differ (temperature, humidity, etc). Remove from mixer and knead with your hands until silky smooth.

2) Form the dough into a ball. Place it in a greased bowl and let rise for ~1hr. Refrigerate the dough for at least 1 hour (until chilled), or as long as overnight. This will slow the fermentation process and will make the dough easier to braid/shape.

3) Decide which shape you want. For this particular recipe, I took the dough out of the refrigerator and divided it into 12 pieces--you can do 6 pieces...whatever size and amount you want. But to make this particular shape you will have to divide each piece into at least 4 smaller pieces...so I think 12 is the limit!

A nice way to achieve the flower/swirl shape (there are multiple ways) is shown in the video below. I did not cut my shapes into exact circles, let alone this many circles. Basically you can modify the technique as you would like:
4) Place dough shapes into greased pan(s) of your choice, cover lightly, and let rise in a warm place for 1.5-2hrs until doubled (it will look very puffy).

5) Preheat the oven to 375F. Right before the swirls are cooked, you can brush them with the egg white of a 4th egg, sprinkle mini chocolate chips into the petals of the roses, and even add sugar on top.

6) Place the chocolate-chipped swirls (on cookie sheet) in oven and bake for about 30-35min. NOTE: every oven cooks differently, so watch your swirls after 10 minutes. The buttery dough should be a golden/deep brown when done, and should sound hollow when tapped on the underside.

7) Remove buns from oven and, after a few minutes, transfer to rack for cooling.

NOTE:
Due to lack of preservatives in the dough, the breads taste the best within the first few hours of baking. I would recommend freezing them if you plan to eat them more than one day after baking, as they will rapidly become stale.
0 Comments

CLASSIC BRIOCHE

9/12/2014

0 Comments

 
     This dough is perfect. It's very flaky and light, yet full of flavor thanks to the key ingredients of butter and egg. You almost can't go wrong with this one. Great flavor, great for shaping, and not messy. I think it's a win.
Yield: 6 medium brioche buns (or 12 smaller buns)

Ingredients:
3 - 3 1/2 cups all-purpose flour
3 Tbsp sugar
1 1/4 Tsp salt
1 tbsp instant yeast
3 large eggs*
1/4 cup milk
10 Tbsp butter
*You can save the white of a 4th egg to brush on the buns if you plan to top them with sugar

Directions:
1) In a mixer or bread machine (programmed for dough), mix together 3 cups of flour and the rest of the ingredients to form a smooth dough. It will be sticky at first and may require the extra 1/2 cup flour to make the dough come together if the conditions in your kitchen differ (temperature, humidity, etc). Remove from mixer and knead with your hands until silky smooth.

2) Form the dough into a ball. Place it in a greased bowl and let rise for ~1hr. Refrigerate the dough for at least 1 hour (until chilled), or as long as overnight. This will slow the fermentation process and will make the dough easier to braid/shape.

3) Decide which shape you want. For this particular recipe, I took the dough out of the refrigerator and divided it into 6 pieces (you can do 12 smaller brioches).

A nice way to achieve the traditional brioche shape (there are multiple ways) is shown in the video below:
4) Place dough into greased pan(s) of your choice (classic ruffled brioche tins, or just muffin tins), cover lightly, and let rise in a warm place for 1.5-2hrs until doubled (it will look very puffy).

5) Preheat the oven to 375F. Right before the swirls are cooked, you can brush them with the egg white of a 4th egg and sprinkle sugar or cinnamon sugar on top.

6) Place buns (on cookie sheet) in oven and bake for about 30-35min. NOTE: every oven cooks differently, so watch your buns after 10 minutes. The buttery dough should be a golden/deep brown when done, and should sound hollow when tapped on the underside.

7) Remove buns from oven and, after a few minutes, transfer to rack for cooling.

NOTE: Due to lack of preservatives in the dough, the breads taste the best within the first few hours of baking. I would recommend freezing them if you plan to eat them more than one day after baking, as they will rapidly become stale.
0 Comments

PRETZEL TWISTS + TWIRLS

9/12/2014

1 Comment

 
UNDER CONSTRUCTION   

This pretzel recipe differs from the others I have on the blog so far--they are never boiled. They are brushed and baked. The result? A crust that is less thick and less chewy--which is not a bad thing--with texture and flavor that is even from the inside out. This dough makes great shapes, and the end result is a light pretzel dough with a lot of tasty character.

UNDER CONSTRUCTION


NOTE: Due to lack of preservatives in the dough, the breads taste the best within the first few hours of baking. I would recommend freezing them if you plan to eat them more than one day after baking, as they will rapidly become stale.
1 Comment

CINNAMON SWIRL BUNS 

9/7/2014

0 Comments

 
     The first version of this bread that I made for my family was gently criticized for not having enough cinnamon. So, I took it upon myself to add more cinnamon everywhere. I put fresh ground cinnamon into the dry ingredients of the dough. I rolled cinnamon sugar into the ropes of dough before braiding, and then I topped the buns with cinnamon sugar just before baking. The result was significantly better. Here is what I did...
Yield: 12 buns

Ingredients:
3 - 3 1/2 cups all-purpose flour
3 Tbsp sugar
4-5 Tsp ground cinnamon (or to your preference)
1 1/4
Tsp salt
1 tbsp instant yeast
3 large eggs*
1/4 cup milk
10 Tbsp butter, softened
*You can save the white of a 4th egg to brush on the buns if you plan to top them with sugar or cinnamon sugar
Extra cinnamon sugar for garnishing (added before shaping the breads)

Directions:
1) In a mixer or bread machine (programmed for dough), mix together 3 cups of flour and the rest of the ingredients to form a smooth dough. Add the salt last when the dough begins to form ropes/clumps. The dough will be sticky at first and may require the extra 1/2 cup flour to make the dough come together if the conditions in your kitchen differ (temperature, humidity, etc). Remove from mixer and knead with your hands until silky smooth.

2) Form the dough into a ball. Place it in a greased bowl and let rise for ~1hr. Refrigerate the dough for at least 1 hour (until chilled), or as long as overnight. This will slow the fermentation process and will make the dough easier to braid/shape.

3) Decide which shape you want. For this particular recipe, I took the dough out of the refrigerator and divided it into 12 pieces. I lightly patted the pieces into small rectangles and sprinkled them with a layer of cinnamon sugar. Then I rolled the rectangle into a long snake/rope shape (about 10-12" long). With some of these 'ropes,' I also made a separate batch and used half of the dough to make a larger, round "turban" shape.

Good examples of both techniques are shown in the videos below:
4) Place dough into greased pan(s) of your choice, cover lightly, and let rise in a warm place for 1.5-2hrs until doubled (it will look very puffy).

5) Preheat the oven to 375F. Right before the swirls are cooked, you can brush them with the egg white of a 4th egg and sprinkle sugar or cinnamon sugar on top.

6) Place swirls (on cookie sheet) in oven and bake for about 30-35min. NOTE: every oven cooks differently, so watch your swirls after 10 minutes. The buttery dough should be a golden/deep brown when done, and should sound hollow when tapped on the underside.

7) Remove buns from oven and, after a few minutes, transfer to rack for cooling.

NOTE: Due to lack of preservatives in the dough, the breads taste the best within the first few hours of baking. I would recommend freezing them if you plan to eat them more than one day after baking, as they will rapidly become stale.
0 Comments

FLOWER/KNOBBY (EPI) BREADS

9/6/2014

0 Comments

 
     I love this dough. It has multiple desirable characteristics: a crispy crust, inner moisture, and predictability of the final shape after baking. When I studied in France, I spent many afternoons at the outdoor flea markets, browsing through (and purchasing a few) bread books. This dough is inspired by these recipes, and I'm convinced the key ingredients for this absolutely marvelous dough are the yogurt and powdered sugar! Shaping is quite easy, taste is lovely. Bonne chance !
Yield: 8 flower breads (or 4 knobby loafs)

Ingredients:
175ml water
200ml yogurt
1.5 Tsp salt
500g flour
2 Tsp powdered sugar
1 1.4 Tsp instant yeast


Directions:
1) Mix all of the dough ingredients EXCEPT the salt in a medium/large bowl— by hand or mixer — until it begins to form strands and come together. THEN add the salt. Continue to mix (about 2min) until a slightly sticky dough is formed. Transfer dough to a lightly floured surface and knead 3-5 minutes until smooth and silky.

2) Place the dough in a lightly greased bowl and cover with plastic wrap. Let rest in warm place for about 1 hour, until doubled.

3) Gently deflate the dough, and transfer it to a lightly floured surface. Divide the dough into 8 pieces to form flowers (in this case, form 8 balls with the dough),  or 4 pieces to form knobbed loaves (in this case, roll the dough evenly with your hands to form a log, about 14-16" long.

4) Place the balls (or long loaves) on a lightly greased baking sheet, cover, and let rest for 15 minutes (they will puff a little). Preheat the oven to 370°F.

5) Using scissors (or a sharp knife), cut the balls in 5 places (do not cut completely to the center of the ball--see picture above) and spread the petals slightly apart. If you are making the Epi (knobby) loaves, shaping is easy and is well demonstrated in the video below:

6) Bake the rolls/loaves for 20 to 25 minutes, or until they're a dark, golden brown and sound hollow when tapped on the underside. Remove them from the oven, and transfer to a rack to cool.

NOTE:
Due to lack of preservatives in the dough, the breads taste the best within the first few hours of baking. I would recommend freezing them if you plan to eat them more than one day after baking, as they will rapidly become stale.
0 Comments

CHOCOLATE PEANUT BUTTER BRIOCHE

9/6/2014

0 Comments

 
     This is an American twist on a classic french bread. I came up with the idea when I was gathering my brioche ingredients and found a pack of Reese's mini peanut butter cups nearby. It is best to shape this bread when the dough is cold/chilled, as the chocolate will melt in warm dough and become kind of messy. This is a rich bread, but it's hard not to like unless you don't like peanut butter!
Yield: 6 medium brioches (or 12 small brioches)

Ingredients:
3 - 3 1/2 cups all-purpose flour
3 Tbsp sugar
6-8 mini Reeses peanut butter cups (or 2-3 regular peanut butter cups), chopped
1 1/4 Tsp salt
1 tbsp instant yeast
3 large eggs*
1/4 cup milk
10 Tbsp butter
*You can save the white of a 4th egg to brush on the buns if you plan to top them with sugar

Directions:
1) In a mixer or bread machine (programmed for dough), mix together 3 cups of flour and the rest of the ingredients to form a smooth dough. Add the salt last as the dough begins to form ropes/clumps. It will be sticky at first and may require the extra 1/2 cup flour to make the dough come together if the conditions in your kitchen differ (temperature, humidity, etc). Remove from mixer and knead with your hands until silky smooth.

2) Form the dough into a ball. Place it in a greased bowl and let rise for ~1hr. Refrigerate the dough for at least 1 hour (until chilled), or as long as overnight. This will slow the fermentation process and will make the dough easier to braid/shape.

3) Decide which shape you want. For this particular recipe, I took the dough out of the refrigerator and divided it into 12 pieces (you can do six and make them bigger). It was at this point that I tucked the chopped Reese's peanut butter piece into the cold dough.

A good examples of the traditional brioche shaping technique is shown in the videos below:
4) Place the dough (now containing the Reese's) into greased pan(s) of your choice, cover lightly, and let rise in a warm place for 1.5-2hrs until doubled (it will look very puffy).

5) Preheat the oven to 375F. Right before the swirls are cooked, you can brush them with the egg white of a 4th egg and sprinkle sugar or cinnamon sugar on top.

6) Place swirls (on cookie sheet) in oven and bake for about 30-35min. NOTE: every oven cooks differently, so watch your swirls after 10 minutes. The buttery dough should be a golden/deep brown when done, and should sound hollow when tapped on the underside.

7) Remove buns from oven and, after a few minutes, transfer to rack for cooling.

NOTE: Due to lack of preservatives in the dough, the breads taste the best within the first few hours of baking. I would recommend freezing them if you plan to eat them more than one day after baking, as they will rapidly become stale.
0 Comments

PIZZA, PIZZA, PIZZA

9/6/2014

1 Comment

 
UNDER CONSTRUCTION
UNDER CONSTRUCTION
1 Comment

FLAT CORN TORTILLAS

9/6/2014

1 Comment

 
UNDER CONSTRUCTION
UNDER CONSTRUCTION
1 Comment

INDIAN ONION KULCHA BREAD

9/6/2014

0 Comments

 
UNDER CONSTRUCTION
UNDER CONSTRUCTION
0 Comments

YEASTED CORN BREADS

9/6/2014

0 Comments

 
     One day I realized I had a bag of corn flour in the kitchen cabinet (from another project) and I decided I had to make bread with it. Cornbread--the mushy richer kind--obviously came to mind. BUT I wanted to use yeast. After much research, I now have a working recipe of yeasted corn breads. The bread itself had a drier consistency, in my opinion, when compared to an entirely wheat-based bread...but that is to be expected when working with corn flour, which has no gluten. If you like a very corny taste, this bread is good to dip (and moisten) in just about any sauce.
Yield: 8 corn rolls

Ingredients:
350g all-purpose flour
180g corn flour
370g water
12g salt
4g instant yeast
28g corn meal (for underside of bread)


Directions:
1) Mix all of the dough ingredients EXCEPT the salt and corn meal in a medium/large bowl— by hand or mixer — until it begins to form strands and come together. THEN add the salt. Continue to mix (about 2min) until a slightly sticky dough is formed. Transfer dough to a lightly floured surface and knead 3-5 minutes until smooth and silky. Depending on the conditions in your kitchen, you may need to add small amounts of water to make the dough more moist, or small amounts of the all-purpose flour to make it more kneadable. I would not add any more corn flour than is called for in the recipe.

2) Place the dough in a lightly greased bowl and cover with plastic wrap. Let rest in warm place for about 1 hour, until doubled.

3) Gently deflate the dough, and transfer it to a lightly floured surface. Divide the dough into 8 pieces and form into rounds.

4) Make a small mound of the corn meal on the counter. Place the rounds on a the corn meal and let it stick to the underside of the breads. Cover the breads and allow them let rest for 20-25 minutes (they will puff a little). Preheat the oven to 370°F.

5). Score the top of the breads in an "X" or however you wish, using scissors or a sharp knife. Using a pizza peel, load the breads directly onto the oven bricks (or pizza stone). NOTE: every oven cooks differently, so watch your buns after 10 minutes. The dough is already yellow, but will still become a darker golden-brown color when done. Most importantly, it should sound hollow when tapped on the underside.

6) Remove buns from oven and, after a few minutes, transfer to rack for cooling.

NOTE: Due to lack of preservatives in the dough, the breads taste the best within the first few hours of baking. I would recommend freezing them if you plan to eat them more than one day after baking, as they will rapidly become stale.
0 Comments

BUBBLY FRENCH BAGUETTES

9/6/2014

0 Comments

 
UNDER CONSTRUCTION
UNDER CONSTRUCTION
0 Comments

RED WINE + WALNUT PUFFS

9/1/2014

0 Comments

 
      This is another bread that is largely influenced by the time I spent in France. I have several French bread books that I acquired from outdoor markets, and a red-wine bread exists in both of them--one pairs it with pecans in the dough, the other with walnuts. This bread has character, and tastes more 'yeasty' than other breads, perhaps because of the small amount of wine/alcohol that flavors the dough. It is tangy
Yield: 12 red wine puffs

Ingredients:
450g all purpose flour
170 ml red wine (of your choice)
100 ml water
2 1/2 Tsp instant yeast
1 Tsp butter, softened
1 Tsp sugar
1 1/2 Tsp salt
35g walnuts coarsely chopped (sweetened, raw, or toasted--you can also substitute pecans)

Directions:
1) In a bowl, pour the red wine, water, butter, sugar, and yeast into a bowl and gently stir (you can do this in a mixing machine if you prefer, I do this dough by hand).

2) Slowly add flour, and stir together until a dough begins to form. Then add the salt and continue to stir/mix
. Transfer dough to a lightly floured surface and knead until smooth and silky (about 5min). The dough will have a pale pink color. At this time, put the walnuts on the counter and on top of the dough and knead them into the dough until incorporated.

3) Place dough in a lightly greased medium/large bowl and cover with plastic wrap. Place bowl in a warm place for proofing for about 1.5-2hrs, or until doubled in bulk. Some people run the dishwasher and place the dough in that warm, humid environment. I have also set my oven to 200F for a few minutes and turn it off; then I wait for a few minutes and place my covered bowl in the warmed oven.

4) Remove the puffy dough from the oven and empty onto a lightly floured surface. Gently pat the dough and divide dough into 12 pieces (you can use a scale to weigh each piece for even baking times).

5) For each of the 12 pieces of dough, bring all of the corners of dough together to the center and pinch to form a ball. Roll the ball on the counter seem-side down to form a smooth ball. Leave the 12 rounds on the floured counter and cover with plastic wrap. Let the rounds of dough rest 30 minutes--they will grow a bit more.

6) Preheat oven to 375F. I prefer to use a pizza peel to load these breads onto a stone at the bottom of the oven. However you can also place the rounds on a lightly greased baking sheet or pizza pan and place them on a lower or middle shelf.

7) Bake the breads for 25-30 minutes.
NOTE: every oven cooks differently, so assess the breads after 10-15 minutes. The slightly pink puffs should be golden/brown when done, and should sound hollow when tapped on the underside.

8) Remove buns from oven and, after a few minutes, transfer to rack for cooling.

NOTE: Due to lack of preservatives in the dough, the breads taste the best within the first few hours of baking. I would recommend freezing them if you plan to eat them more than one day after baking, as they will rapidly become stale.
0 Comments

AIRY OLIVE ROLLS WITH HERBS

9/1/2014

0 Comments

 
     This dough was really airy and flaky, with a beautiful crumb. It's actually the bread that is featured in the large photo on the home page. I chose to put olives and fresh backyard herbs in this dough. I think it is capable of holding a lot of different ingredients, but this night in particular I wanted to do olives and herbs. You almost can't go wrong with that...
Yield: 12 olive rolls

Ingredients:

1 cup lukewarm water
1/4 cup milk
3 cups flour
2 tablespoons olive oil
2-3 tablespoons herbs (the amount and type are your choice!)
1 teaspoon salt
1.5 teaspoons instant yeast

Directions:
1) Combine all of the ingredients, mix, and knead (my preference is always by hand because that's how I was taught), mixer, or bread machine set on the dough cycle — until smooth, adding additional water or flour as needed. Add the salt last, as the dough begins to form ropes/clumps.

2) Cover the dough, and let it rise for 1 hour.

3) Divide the dough into 4 pieces, shape into logs, and place in lightly greased mini loaf pans. For one large loaf, shape the entire piece of dough into a log and place in a lightly greased 9" x 5" loaf pan.

4) Cover and let rise until the dough has crowned about ½" over the rims of the mini loaf pans, or 1" over the rim of the larger pan, 30 minutes to 1 hour, depending on the warmth of the kitchen. Towards the end of the rising time, preheat the oven to 350°F.

5) Bake the bread for 30 to 35 minutes for the mini loaves, 35 to 40 minutes for the larger loaf. An instant-read thermometer, inserted into the center of a loaf, should register at least 190°F. Tent the bread lightly with foil if it appears to be browning too quickly.

6) Remove the bread from the oven, turn it out of the pan, and cool on a rack.

NOTE: Due to lack of preservatives in the dough, the rolls will taste the best within the first few hours of baking. I would recommend freezing them if you plan to eat them more than one day after baking, as they will rapidly become stale.
0 Comments
<<Previous

    Author

    Female.
    Amateur.
    Italian-American.
    New Jersey.
    USA.

    Categories

    All
    Bread
    Breakfast
    Brioche
    Cheese
    Crusty Bread
    Dessert
    Flat Breads
    French + Italian
    Pasta
    Pizza
    Pretzel
    Sauces/Dips
    Stuffed Breads

    Archives

    January 2015
    December 2014
    October 2014
    September 2014
    August 2014

    RSS Feed

    Instagram
Powered by Create your own unique website with customizable templates.